Pages

Sunday, November 25, 2012

Begun chirer pulao - a side dish using brinjal and poha

Isn't the name begun chirer pulao, catchy? However, it is slightly misleading because it is not a pulao per se. It does not make a meal by itself but it does make a spicy, lip smackingly good side dish. The recipe is from Bong mom's cookbook. I have made changes to suit our palate.

What you need:
Brinjal/eggplant - 1 large, sliced into 1/2 inch thick rounds
Poha/flattened rice/aval - 1 cup
Thick curd - 1/2 cup
Turmeric  powder - 1/2 tsp
Kashmiri chilli powder - 1 tsp
Salt - to taste
Garam masala - 1 tsp
Green chillies - 2 or 3, slit lengthwise
Asafoetida
Oil - 2 tsp + some more for drizzling over the brinjal and poha

Wash the sliced brinjals well. Sprinkle some turmeric powder and salt over the slices and let it rest in a colander for 15 minutes. Squeeze out excess water, drizzle some oil over the slices and then bake in a preheated oven at 175 degree centigrade for about 10-12 minutes, turning over once halfway through, until the slices start to shrivel up slightly on the edges. Time will vary depending on your oven. I have an option called Crisp in my microwave, which is what I used and it took me about 12 minutes.
While the brinjals are in the oven, getting cooked, mix the turmeric powder, chilli powder and a little bit of salt to the curd. Mix well and set aside.
Drizzle some oil over the poha and heat this in the microwave for about 2 minutes until the poha turns crisp.
Heat 2 tsp of oil in a thick bottomed pan. Add  a generous few pinches of asafoetida and the slit green chillies. Saute for a minute. Now reduce the heat to low and add the curd mixture. Stir well and heat until you see oil separating from the mixture. Add half a cup of water and the baked brinjal slices. Mix well and let it come to a boil. When the mixture starts thickening and 3/4th of the water content has evaporated, stir in the crisp poha and the garam masala. Mix well and switch off the heat.
Serve immediately with rice/roti.
Check out the Blogging Marathon page for the other marathoners doing BM#22.
 

Saturday, November 24, 2012

Dum aloo

There are some combinations that you just cannot go wrong with - Luchi and Dum aloo is one of those. The puffed white puris and the potatoes cooked in an aromatic mix of spices is a pairing that is meant to be.
When I decided that I was going to make luchis for this blogging marathon themed on Bengali cuisine, I knew that I had to pair it with Dum Aloo. I immediately remembered the Dum Aloo that my friend D had cooked and brought to work one day and promptly sent a mail to her asking her if she could send me the recipe. Despite being bogged down by work, she did so within 10 minutes of getting my mail and I've followed her recipe to the T. Thank you D for a keeper recipe.

What you need:
Potatoes - 1/2 kg, boiled, peeled and cut into small pieces
(The original recipe calls for baby potatoes, but I had none on hand)
Tomato - 4 large, finely chopped
Oil - 2 tsp
Turmeric powder - 1/2 tsp
Salt - to taste
Ginger - 1 inch piece, julienned and some more crushed to get about 2 tsp of ginger juice
Separately dry roast and powder the following:
Corriander seed/dhania - 2 tbsp
Cumin seeds/jeera - 2 tsp
Red chillies - 5 or 6
Black pepper corns - 5 or 6

Heat oil in a pan. Add the julienned ginger, followed by the chopped tomato, salt and half of the powder. Cook on low heat until the tomatoes soften. Stir in the potatoes, the rest of the spice powder and about half a cup of water. Stir well and boil for a while until the spice mix coats the potatoes well. Add the ginger juice, a tsp of ghee and mix well. Remove from heat and serve hot with luchis.

Check out the Blogging Marathon page for the other marathoners doing BM#22.


Luchi - deep fried delight

It's time for another Blogging Marathon and this time, the theme I have chosen is Bengali cuisine. Nothing is as quintessentially Bengali as the puffed white puris made of maida - known as luchi.

What you need:
Maida/All purpose flour - 2 cups
Oil - 2 tbsp
Salt - 1/2 tsp
Water - enough to knead into a soft, pliable dough
Oil - for deep frying the luchis

Take the flour in a large mixing bowl. Add the oil to it and mix well. Now add salt and then water, little by little, and knead well until the dough becomes soft and pliable.
Keep covered for at least 30 minutes.
Pinch out small balls of the dough. Take a few teaspoons of oil in a shallow plate. Roll the balls of dough in this oil and then roll out into thick, small circles.
Deep fry in hot oil, pressing down with a slotted spoon, to ensure that it puffs up well. Turn over once.
Drain off excess oil and remove on to your serving bowl.
Serve hot with any curry of your choice.
I served this with aloo dum, which is the subject of tomorrow's post.

Check out the Blogging Marathon page for the other marathoners doing BM#22.


Monday, November 19, 2012

Minestrone soup

I have often stated on this blog that my all time favourite soup is the minestrone and that Olive Garden, in my opinion, makes the best minestrone. For the past several years, I have ordered minestrone at many other restaurants, hoping that it will match up to the taste of that from Olive Garden but sadly, that has not happened yet.
So, I did the next best thing - and that is to make minestrone at home, recalling ingredients from memory, and I must say that I am quite happy with the result - a filling soup that you will keep coming back for more of.

What you need:
Chickpeas/ garbanzo beans/ kabuli chana - 1/4 cup
Red kidney beans/rajma - 1/4 cup
Dried green peas - 1/4 cup
Onion - finely minced - 1/2 cup
Carrot - chopped - 1/2 cup
Celery - 1/2 cup, finely chopped
Shell macaroni - 1/4 cup
Butter - 3-4 tbsp
Soya sauce - 1 tsp
Italian soup seasoning - to taste (I recommend using this generously)
Salt - to taste
Freshly ground black pepper
Grated parmesan cheese

Soak the chickpeas, red kidney beans and green peas in plenty of water for 8-10 hours.
Heat butter in a thick, heavy bottomed pan. I used the pressure cooker to do this. Saute the chopped onion, carrot and celery on low heat until brown. Add the soaked beans, salt, soya sauce, 4 cups of water and shell macaroni. Cover and cook till one whistle. Then reduce the heat to low and cook for a further 15 minutes.
Once the steam escapes completely, open the lid, stir well and add Italian soup seasoning. At this stage, if you feel the soup is too watery, boil for a while more to reach the required consistency and if you feel it is too thick, add some water and heat through.
Just before serving, add freshly ground black pepper and grate some parmesan cheese over the soup.

Check out the Blogging Marathon page for the other marathoners doing BM#22.

Sunday, November 18, 2012

Chana/chickpeas dosa

I had grand plans for the second day of the blogging marathon under the theme cooking with chickpeas. I had decided even before I started this marathon that each day I would post something I had not tried making before. So, today's post was supposed to be something from another cuisine for which I needed white kabula chana/garbanzo beans. However, fate had other plans. Yesterday in the afternoon  Bal Thackeray passed away. Within 30 minutes, the always busy city, came to a grinding halt. All shops were shut down, autos and taxis went off the road and the roads themselves wore a deserted look. This, to me, meant - no way of procuring kabuli chana. I had to make do with what I had on hand - black chickpeas- and thus, resorted to making something that is all too familiar in our household - the humble dosa, this time, using chickpeas.
 
What you need:
Kala chana/black chickpeas - 1 cup
Parboiled rice - 1 cup
Red chillies - 3 or 4
Ginger - 1 large piece
Onion - 1
Cumin seeds - 1 tsp
Salt - to taste
Water - for grinding

Soak chickpeas and rice in plenty of water for 6-8 hours.
In a blender, take all the other ingredients and grind coarsely. Add the soaked chicpeas, rice and enough water to grind into a batter of pourable consistency.
Heat a dosa tawa/griddle. Pour a ladleful of the batter and spread into a thin circle.
Drizzle with oil on top. When the bottom starts to brown, flip over and cook for a minute.
Serve hot with chutney/sambar.

Check out the Blogging Marathon page for the other marathoners doing BM#22.
This goes to Kalpana who is guest hosting Priya's event - Fast & Quick Healthy dishes.

Saturday, November 17, 2012

Chickpeas stuffed braided bread

A few years back, bread to me, meant a packet of Modern or Britannia white bread picked up from the neighbouring store. That was before blogging happened. Now, I know that bread isn't just bread - there is whole wheat bread, there is multi grain bread, focaccia, no-knead bread - the variety is endless. The simple, short term bread encompasses a whole world within it.
I am amazed that I am able to bake good bread at home and that I have become more and more adventurous by trying out my hand at different kinds of bread. I am participating in the Blogging Marathon this month, and the theme I have chosen for this week is Cooking with chickpeas. I was certain that I did not want to take the well travelled path and make chole or kadala curry. I racked my brain to see how I could come up with something 'different' and that's when the idea of this stuffed bread was born. The basic bread recipe I have used is the same as the one I have used in my Iyengar bakery style stuffed buns.

What you need:
For the bread :
Maida/All purpose flour - 2 cups (heaped)
Vanaspati / vegetable shortening - 3 tbsp
Yogurt - 1 tbsp
Milk - 2/3 cups
Salt - 1 tsp
Sugar - 2 tbsp (Use 1 tsp from this for proofing the yeast)
Yeast - 1 tbsp

Dissolve 1 tsp of sugar in 1/4 cup of lukewarm milk. Add the yeast to this. Cover and set aside for about 10 minute until the yeast mixture becomes frothy.
Take the maida, sugar and salt in a large mixing bowl. Make a well in the center. Add the yeast mixture, milk, yogurt and vegetable shortening. Knead to a soft, pliable dough. Cover and keep aside in a warm place to rise until double in volume. This take about 1.5 to 2 hours. Once it rises, punch the dough down and keep aside for a second rise (roughly 45 minutes)

For the stuffing:
Chickpeas/chana/konda kadalai - 1 cup, soaked in plenty of water overnight
Medium potato - 1, cooked, peeled and mashed
Onion - 1, sliced thin and long
Tomato - 1
Turmeric powder - 1/2 tsp
Garam masala - 1 tsp, heaped
Salt - to taste
Oil - 5 tsp
Cumin seeds - 1 tsp

Pressure cook the chickpeas until one whistle and then reduce the heat and cook for a further 20 minutes. The chickpeas should be cooked until soft and you should be able to easily mash it. Lightly mash the cooked chickpeas and keep aside.
Heat oil in a kadai.Add the cumin seeds. When the seeds start to sputter, add the sliced onions and a quarter tsp of sugar. Saute until brown. Add in the tomato and cook till soft. Now add the mashed potato, chickpeas, turmeric powder, garam masala and salt. Mix well and heat until all moisture evaporates.
Keep aside to cool.

To make the stuffed bread :
Transfer the dough to a generously floured kitchen counter. Roll it into a thin, long rectangle/oval shape.
 
Spread the stuffing in the middle of the rectangle.
 
On both sides of the stuffing, cut the dough into parallel strips.
 
Criss-cross the strips over the stuffing to make braids. Apply a mik wash over the dough. This will give an even brown colour while baking.

Preheat oven to to 175 degrees. Bake for 22-25 minutes until golden brown.
 
Wait until it cools a little and then, cut into thick slices and dig in.


 Check out the Blogging Marathon page for the other marathoners doing BM#22.
This bread goes to Let's Party - Eggless Bakes and Treats - an event started by Surabhi and guest hosted by Nivedhanams Sowmya.


Thursday, November 15, 2012

The Bankster - A book review

The Bankster is the first book of Ravi Subramanian's that I have read. Despite the fact that I had not read the author before, I was quite thrilled to receive an autographed copy of the book.
The excerpt on blogadda sounded interesting and so, I decided to sign up to do a review. However, once I got the book, I somehow lost interest and didn't touch it for a few days. For some reason, I felt that it would not be interesting....and honestly, I am never a person to judge a book without reading at least a few pages first. Having signed up to do the review, I couldn't put the book away for too long.....and once I started reading, I realized just how wrong I had been about it. The fact that I finished reading the entire book in a night should tell you something about it.

Ravi Subramanian has been described by The Wall Street Journal as the John Grisham of banking, and the cover of the book does look quite Grisham-esque and maybe that's what made me postpone reading the book. Talk about judging a book by its cover!
The story starts in Angola and then moves on to Kerala, Mumbai and Vienna. In the beginning, it looks as if there are different stories being played out in the book, but towards the end, the author manages to bring it all together beautifully The characters are well etched.and the plot, interesting and taut.

Money laundering is a reality and something that we've all read about in the news papers for the last few years. The author, through this story, shows us how even innocent sounding NGOs and top bankers could fall prey to the desire to make a quick buck.

Indrani - the CEO of the bank, Vikram the ruthless go-getter who is constantly looking for new ways to make money, Raymond - the brainy but lonely chap from the Fraud department, Harshita - a hardworking sales person whose importance in the organization diminishes when a sexy siren who is not afraid of using her assets to her best advantage are characters that you will find echoes of in the people around you.

I liked the parts that happen in the Corporate office in Mumbai the best and the ones that happen in Kerala the least - because what happens in Mumbai is fast paced and keeps you wanting to read more. In fact, I impatiently turned over the pages to find the next chapter that told me more of the happenings in the Corporate office.

I guessed who the "villain" was - a few chapter down the line.....don't ask me how....I just did. The end is a little too dramatic and just a tad filmy - with all the figuring out happening in the board room. However, with the leaps and bounds in technology, it is not entirely unbelievable. There is huge Bollywood element though, in the way in which the "villain" is finally found. Can't help saying that and I hope I haven't given too much away and spoiled the punchline for other readers.
All in all, The Bankster is a good read - interesting and fast paced. It is published by Rupa Publications and retails for Rs 250.
This review is a part of the Book Reviews Program at BlogAdda.com
Participate now to get free books!

Saturday, November 10, 2012

Badusha

For the last few years, I have been toying with the idea of making badusha for Diwali, but have been a little scared of venturing into trying my hand at such a traditional sweet since I think that the making of all traditional Indian sweets requires quite a bit of practice and patience. This year, armed with Mallika Badrinath's "200 traditional sweets", I set about making badushas. The first few that I fried crumbled and melted into the oil, turning the clear oil into an opaque white liquid.....and strengthening my belief that sweets like this one should be made only by experts at sweet shops like Adayar Ananda Bhavan or Grand Sweets. Luckily, the thought of all the effort that had gone into kneading the dough and the cost of ingredients involved made me persist. Some quick fixes later, I fried the next batch of badushas, which turned out quite well.....nice and brown on the outside, flaky and melt-in-the-mouth on the inside.


What you need:
Vanaspati/dalda - 5 tbsp(level)
Cooking soda - 2 pinches
Maida - 1.5 cups
Oil - for deep frying

For the sugar syrup
Sugar - 1 cup, heaped
Water - 1/2 cup
Heat sugar and water together until it reaches one string consistency. Switch off heat and keep aside.
One string consistency - The syrup reaches this consistency a few minutes after all the sugar has dissolved. To test if it has reached this stage, take a drop of the syrup on your index finger. Touch it with your thumb and slowly move the two fingers apart. If you a see a single string stretching between the two fingers, it is time for you to switch off the heat. If not, you need to heat the syrup some more.
To make badusha:


Take the vanaspati in a broad vessel. Add the soda to it and rub with your palm until it becomes white and frothy. This takes 10-15 minutes. A better alternative is to use an electric beater. This is what I did, and it took close to 5 minutes of beating on low speed.
Now mix in the maida with your fingers until the dough becomes crumbly. Sprinkle a little bit of water and knead into a soft, pliable dough. Keep this covered under a wet cloth for 15 minutes.
Divide the dough into lemon sized balls, flatten it slightly between your palms, make a depression in the center and deep fry in hot oil until well browned on both sides. The entire cooking process must be done on a low-medium flame as we need to ensure that the inside is well cooked. If the flame is high, the outside will brown, but the inside will remain uncooked. Turn over once or twice to ensure even browning.
Drain excess oil and put the fried badushas into the sugar syrup. Keep it immersed in the sugar syrup until the next few badushas you fry are ready to be put into the syrup. Remove onto a flat plate. Decorate with chopped nuts/cherries.
This keeps well for upto a week.

Lessons learned:
While this is not exactly an easy sweet to make, it is not very difficult either, if you have the measurements right. The first mistake I made is adding too much dalda. I added 5 heaped tablespoons, plus some more, where the recipe called for only 5 levelled tbsps.
Excess dalda is what made my badushas dissolve in the oil. I had to add quite a bit more of maida to it to ensure that my badushas did not crumble as soon as they came into contact with hot oil. I have not measured how much more maida I added, but in case you make the same mistake, keep adding maida until the dough does not leave your hand feeling sticky and oily.
I also learned that oil, whether it is clear or opaque, serves the purpose equally well. I fried the rest of the badushas in the oil into which the first few had crumbled and dissolved, and it did not take anything away from the end product.

Updated this year (2012) with new pictures. The collage shows the step-by-step pictures of the process of making badushas. This year, I have decorated the badushas with cherries and colourful sprinkles. 

Thursday, November 08, 2012

Seven cup cake - An easy Diwali sweet

 Seven cup cake is one of the sweets that my mother whips up with ease whenever there are guests or even when there aren't. Despite the name, this sweet is neither a cake nor a cup cake. It is in fact, more like a burfi - a very soft and addictive one at that. 

I have always been am scared to try my hand at making Indian sweets - in this case, because, turning out a perfect barfi that will hold its shape, and be not too soft(that will make it a halwa) or too hard (that will ensure that the dentist has a very happy Diwali) requires knowing the precise moment at which the heat is to be switched off.
With this recipe, chances of going wrong are very less(note that I didn't say nil) because it doesn't involve complicated steps like letting the sugar syrup reach a certain consistency or  hours and hours of stirring to get a glossy sheen. On the face of it, the recipe is pretty simple - you mix all the ingredients together, and stir them. The only catch is that you need to know when to take it off the stove. It is all very easy to say when the mixture starts leaving the sides of the pan......but without practice, you won't know when the sides are just boiling and bubbling and when they start to sort of curl in to indicate that you can switch off the heat.
This is the first sweet that I have made for this Diwali and I can't help but gloat over the fact that I was able to slice it neatly into pieces and it just melts in the mouth.

What you need:
Besan/Gram flour - 1 cup
Ghee - 1 cup
Milk - 1 cup
Grated coconut - 1 cup
Sugar - 3 cups

Take all the ingredients in a large, thick bottomed kadai. Mix well.

Cook on medium heat. I have pictorially tried to show you the various stages that the mixture will pass through.

When the mixture starts thickening and leaving the sides of the pan, pour on to a greased plate.

When warm, score with a sharp knife into square or diamond shapes.

Once cool, cut into pieces and store in an airtight container.

Monday, October 15, 2012

No knead focaccia with caramelized onions

A lot has happened between my last food post and this one. For one, we have moved cities AGAIN. I am now a Mumbaikar doing my best to do justice to the umpteen kinds of street food served in the city. Between sampling every kind of chaat imaginable and setting up home in this city, I totally forgot to acknowledge the sixth anniversary of this blog which came and went  in June this year.
 Suma Rowjee's No Knead Focaccia is something that I wanted to bake when she posted it waaaay back in May of last year. Then, of course, I promptly forgot all about it until she re-posted it on facebook yesterday. Memory and want rekindled, I decided to bake it today. The basic recipe I have followed is hers, with changes made to suit our palate, as far as the add-on ingredients go.

What you need:
Maida/All purpose flour - 1.5 cups + 2 tbsp
Lukewarm water - 3/4 cup
Salt - 3/4 tsp
Active dry yeast - 2 tsp
Sugar - 1/2 tsp
Oil - 1.5 tbsp
Juice of half a lemon
Onion - 1 large, chopped lengthwise into thin  strips
Seasoning - I used a mix of dried garlic, rosemary & parsley - 2 tsp (to be mixed with the dough)+ 1 tsp(for sprinkling on top)

Step 1 : Proof the yeast.
Dissolve sugar in water. Add the yeast to it. Mix well and let it stand covered for 10 minutes till it becomes frothy.
Step 2 : Caramelize onions. 
Take a teaspoon of olive oil in a pan. Stir in the onions along with a teaspoon of sugar. Saute on low heat till light brown. I did not let them turn dark brown in the pan as I felt that the onions would burn once they were in the oven.
Step 3 : The dough
Mix all the ingredients (including the caramelized onions) together with a wooden spoon. Once well mixed, stir it around 20 strokes with the spoon. Grease a round baking dish generously with oil (I used olive). Transfer the dough to the greased dish and spread it using your greased hand. Cover and let it stand for an hour. After an hour, I found that my dough had not risen much. So I let it stand for another 30 minutes. Again, not much of a rise, but the dough did look puffy and aerated. Dimple the surface of the dough with your fingers. Drizzle 2 tsp of olive oil and 1 tsp of seasoning on top. Preheat the oven to 200 degree centigrade. Bake for 20-25 minutes. Mine looked done at about 20 minutes, but I put it in for an additional four minutes to let the top brown further.
Cool on a wire rack.


Slice and enjoy!!!

My thoughts :
This really is an easy and fool proof recipe. If you are looking for a good recipe to start baking bread with, this is it.
The caramelized onions add a lovely flavour to the bread. However, feel free to substitute with any topping of your choice. I think I did the right thing by not letting the onions brown too much. By the time they were out of the oven, they were crisp and beautifully browned.


Wednesday, October 03, 2012

Book Review - The Krishna Key

I am a huge fans of books that deal with Indian mythology. Ashwin Sanghi, the author of Rozabal Line and Chanakya's Chant, both popular books in their own right, has now come out with a new book called The Krishna Key. I loved Sanghi's Rozabal line......liked his Chanakya's Chant and am a little ambivalent about this one.
The book is evidently extremely well researched. There is a lot of information, which in the beginning, though captivating and interesting, after a little while, starts to get overwhelming. To quote one of the characters in the story, there is so much information that it makes one's head reel.
This genre of stories became popular with Dan Brown's Da Vinci Code and in the Indian context, there are so many mysteries.....so many myths that could be beautifully woven together to make a story which leaves one wondering if everything we've been taught to believe of as the truth is, in reality, true or not.
Sanghi's novel uses the story of Krishna as the background. It particularly deals with the final avatar of Krishna - the Kalki avatar, the story of which generations of Indians have listened to while growing up. The Kalki avatar is believed to arise when dark forces are on the rise and is believed to be the annihilator of all evil. A young man, believed to be the final avatar, kills people in a particular manner, each time leaving behind one of the sacred symbols of Vishnu.
What is the purpose of these killings? Is this young man truly the Kalki avatar or is he merely someone who is a pawn in the hands of a much more powerful entity?

A book written by an author who went by the pseudonym Shawn Haigins while publishing his first book, cannot be complete without word play – and there is, expectedly, a lot of that. Anagrams,word puzzles, coding and decoding of letters - all these are there in plenty in various parts of the book. 
Initially, the book is fast paced and keeps you wanting to read more. However, like I said in the beginning, in a while, you are bombarded with so much information, that a part of it is not even processed by the brain.
The author takes the reader on a journey to several places that are famous for their connection to Krishna and Shiva- Dwaraka, Vrindavan, Kalibangan, Kailash & Somnath, in an attempt to find a priceless treasure that is believed to have been left behind by Krishna. 
Is Krishna a real being that lived in India several centuries back or is he merely a figment of the collective over imagination of a people who idolized their Gods? Could India truly have been the forerunner in several fields including medicine, science, architecture and mathematics? Is it possible that ancient Indians new much more than all the best brains of the developed world put together? These are some of the questions that came to my mind as I was reading "The Krishna Key".
The Krishna Key is published by Westland and is available in shops for Rs 250/-
While the price makes it an attractive buy, I do not think that it is as good as Sanghi's Rozabal Line. That doesn't mean that it is a bad read. It is definitely something that you should read atleast once, especially if you are interested in this kind of fiction.
This review is a part of the Book Reviews Program at BlogAdda.com. Participate now to get free books! 

Monday, July 30, 2012

Book Review - Zomato Restaurant Guide 2012

Blogadda sent me the Zomato Restaurant Guide 2012 (Bangalore) a while back and I must start off by apologizing to the people at blogadda for posting this review so late.
Anyone who loves eating out and scouts around for reviews before deciding where to eat must be familiar with zomato.com. Zomato is the largest electronic restaurant guide in the country serving more than three million users every month. This guide aims to reach out to people who want an offline experience that distils the best of the website in an innovative and user-friendly form.
Here's what I think of the book:
The look : The cover looks classy and makes you want to open the book and take a look at what's in it. Glossy, good quality paper is another plus that adds to the feel-good factor of the book.
Inside : The book is divided into neat sections - the first one being a little introduction to zomato. Then there is a section on how to use the food guide. There is also a section that details the Citibank Dining Privileges that are available at over one thousand restaurants across India.
Restaurants are divided into 22 categories. Under Restaurant categories, are listed the name of the restaurants falling under that category, the type of cuisine served,  the typical cost that a person can expect to pay at each restaurant in that category, the location, and icons to indicate whether a restaurant is vegetarian or not, or whether dine-in, delivery or a bar is available or not.
To find details on any particular restaurant, you would turn to the page number that's mentioned next to the name of the restaurant. The Restaurant details include all the details that you would want to know about the restaurant(s) you have shortlisted - the address, phone number, opening hours, Citibank discounts if any, description, reviews, rating and special features. Each restaurant also has a QR code which is a smart feature that has been incorporated in the Restaurant details section. Using a smart phone, the QR code can be scanned to view the restaurant's menu on zomato's WAP portal.
Ratings are out of 5, and are based on an average of user ratings received by the restaurant on the zomato website. The user review is a short snippet of reviews posted online.
The guide is easy to use and handy while making a decision. I especially like the 'Don't Miss' section which tells you what is a must-try at a particular restaurant.
What could be better:
To me, a guide is something that is unbiased. In this guide, all the reviews printed are positive. It would have been better if a balanced view had been given. Of course, the rating tells me what I want to know, but I find it a bit of a conflict to see a rating of 3, which to me suggests average, with a review that calls the service or the food excellent and the restaurant a connoisseur's paradise.
Who should buy the book:
If you like dining out, collecting books and reading up on restaurant reviews, then this book is for you. Priced at Rs 199, it will not burn a hole in your pocket and is definitely not a bad buy.
 However, a person like me would prefer the website to the book, because, like I said before, I like detailed reviews and I like to see what different people have to say about the restaurant in order to get a balanced view of it.

This review is a part of the Book Reviews Program at BlogAdda.com. Participate now to get free books!

Tuesday, June 12, 2012

Cooking with kids - pizza

A while back, I posted a simple pizza sauce recipe. The pizza that I made using that sauce never got posted. Like I have said in the pizza sauce post, the inspiration for the sauce came from a book that the little girl and I read. After making the sauce, I cut up some of her favourite veggies and gave her free rein in assembling everything on a ready made pizza base. A few minutes in the oven - and we had a healthy and colourful pizza ready.

What you need:
Pizza base - 1
Pizza sauce (recipe here)
Veggies of your choice - sliced and lightly steam cooked (I have used sprouts, baby corn and capsicum)
Grated cheese - for topping

Spread the pizza sauce evenly and generously on the base. Arrange the sliced veggies on top of that in a single layer. The veggies should be cooked but still crunchy. Top with grated cheese. Cook in the microwave at 80% power for 8-10 minutes or until the grated cheese melts.

This is my second post for this week's blogging marathon themed on Kids' delight - Evening snacks.
Check out the Blogging Marathon page for the other Blogging Marathoners doing BM# 17 
This post goes to Radhika's Let's cook - Kid's special

Sunday, June 10, 2012

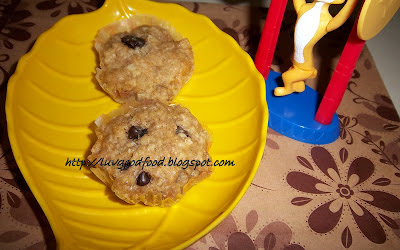
Banana chocolate chip muffins

Making healthy snacks for kids is an art. Dodging requests for Maggi, Lays or Kurkure every evening and providing something healthy in its stead is definitely something that requires practice and a certain amount of sternness and will power. These muffins are easy to whip up, healthy and at the same time something that kids will love. In fact, my little one made this herself. She did the measuring, the mixing and the spooning into the muffin tin. Needless to say, she enjoyed eating what she made.

What you need: (Recipe adapted from Tarla Dalal's Healthy snacks for kids)
Bananas (mashed) - 1/2 cup(I used 3 small overripe ones)
Whole wheat flour - 4 tbsp
Oats - 2 tbsp
Sugar - 1/4 cup
Vanilla essence - 1/2 tsp
Oil/butter - 1/4 cup
Baking powder - 1/2 tsp
Chocolate chips - 1/4 cup
Salt - 1 tsp

Mash the bananas in a small mixing bowl. This is a task my little girl did very meticulously and with great enjoyment. Mix the vanilla essence and sugar into it.
Take the whole wheat flour, oats, salt and baking powder in a large bowl. Add the banana mixture and oil to it. Mix well. Gently stir in the chocolate chips
Preheat oven to 150 degree centigrade.
Line/grease your muffin tin. Spoon the batter into the muffin tin. Bake for 20-25 minutes until a skewer inserted in the middle comes out clean.
Enjoy!!!

This is my first post for Blogging Marathon #17 themed on Kids' Delight - Evening snacks/Tiffin. Check out the Blogging Marathon page for the other Blogging Marathoners doing BM# 17
This post goes to Radhika's Let's cook - Kid's special


Tuesday, May 29, 2012

Baked brinjal crisps

This recipe, if I may call it that, is so simple that I wasn't sure if I should post it. It has been in my drafts for a very long time. The inspiration for this dish is a post by Srivalli ages back. It is something that my little girl loves to munch on and so I thought it would be the perfect way to end this month's blogging marathon in which my chosen theme is Kids Delight.

What you need:
Brinjal/eggplant - washed and dried individually
Salt
Red chilli powder
Oil - a little, just enough to lightly coat the sliced brinjals

Slice the brinjals into thin circles. In a large mixing bowl, toss it with the salt, chilli powder and oil. Arrange the slices in a single layer on a cookie sheet. Microwave on high for 6-7 minutes, turning over once midway.
Enjoy!!!

Notes:
Microwave times and powers vary....so please keep a close watch as the brinjals get done.
The fact that I only have a "before" photo should tell you how good and addictive this is. I had no crisps left to click an "after" photo.

Check out the Blogging Marathon page for the other marathoners doing BM#16.
This post goes to Smitha who is hosting Kids' Delight this month 

Monday, May 28, 2012

Roasted peanuts

There is no person who does not wish to relive childhood, to go back to that golden age where everything was fun and frolic. What makes childhood so special, irrespective of the circumstances that you grew up in? I believe that memories have a large part to play in this. There are so many pleasures of childhood that we forget as we grow up.........we no longer have time to just be - to 'stand and stare'.

 
I was just transferring a newly bought packet of peanuts into a jar when I suddenly remembered the kappalandikkaran (literally translates into peanut man) who used to be eagerly awaited every evening. He was a wizened old man who came on the dot at five every evening, pushing his peanut cart. A bell on the cart, rung every now and then would alert all the kids in the households that he was on his way. The cart was set up with everything that he needed to supply freshly roasted peanuts to eager, shiny eyed kids. There was a stove on the end closest to him. On top of it was a large, broad pan filled with sand. On top of the sand was a thick, heavy iron kadai on which he tossed and turned peanuts with a little bit of salt sprinkled on top. Next to the stove was a bunch of old newspapers cut into neat squares. These would be deftly rolled out into cones even as the kids looked on with glee, and filled with hot, sand-roasted peanuts. All this for 50 paise. Time went on and the old man couldn't be seen on the streets anymore. He probably fell ill or passed away. I had all but forgotten about this simple eat that had given me so much happiness as a child.
Luckily, at some point, I started thinking about all this and even told my daughter about this treat that my grandfather would buy for me every evening. And then, while she watched, I put my kadai on the gas stove, threw in a handful of peanuts, sprinkled some salt over it and toasted them over a slow fire for 12-15 minutes until they were well browned. Then, she rolled some old newspaper into cones and I filled them with hot peanuts for her.

As I type this, she is munching on those peanuts.....and making happy memories.

Check out the Blogging Marathon page for the other marathoners doing BM#16.
This post goes to Smitha who is hosting Kids' Delight this month 

Sunday, May 27, 2012

Green peas uttappam

I try to add as many veggies as possible to everyday dishes, so that they look colorful and are nutritious.

What you need:
Dosa batter
Cooked sprouted green peas - 1 cup
Tomato - 1, large, chopped fine
Curry leaves - a handful, chopped fine
Corriander/Cilantro leaves - a handful, chopped fine.

Mix the cooked peas, tomato, curry leaves and cilantro with some salt in a large mixing bowl.
Heat a dosa pan/griddle. Spread a ladleful of batter in a thick circle. Spoon about 3-4 tsps of the veggie mixture over the batter. Drizzle some oil over this. Cook on a medium flame till the underside turns brown.
 

Flip over, reduce the flame and cook for a minute or two.
 
Serve hot with chutney of your choice.

Check out the Blogging Marathon page for the other marathoners doing BM#16.
This post goes to Smitha who is hosting Kids' Delight this month 


Saturday, May 26, 2012

Bajra Vermicelli Upma

Cooking in summer is all about spending as little time as possible in the hot kitchen. It is about making one pot meals that are nutritious, filling and quick to make. This bajra(pearl millet) vermicelli upma is one such dish that can be made with minimal effort.

What you need:
Bajra (pearl millet) vermicelli - 1 pkt (180 gms)
Onion - 1, chopped fine
Green chilli - 2, minced
Ginger - a one inch piece, julienned
Sprouted green peas - cooked, 1/4 cup
Peanuts - 2 tbsp
Salt - to taste
Oil - 1 tbsp
Broken Urad dal -  1 tsp
Mustard seeds - 1 tsp
Curry leaves - a handful

Soak the vermicelli in plenty of water for a minute. Drain and transfer to a perforated pan. Steam cook for 5 minutes. Set aside.
Heat oil in a pan. Add the urad and mustard seeds. When the seeds pop, add the curry leaves, green chilli and ginger. Saute on low heat for a minute. Add the peanuts and fry till they start to brown. Now add the onion and saute till translucent. Stir in the green peas and heat for a minute. Add the cooked vermicelli and salt. Stir well and heat for a minute or two.
Serve hot with pickle and curd or with any chutney of your choice.

Note : If you live in or are visiting Coimbatore, Bajra vermicelli is available in Kannan Department Store, which also stocks other varieties like Wheat vermicelli and tomato vermicelli. The tomato vermicelli tastes really good too. 
Veggies like carrot, beans, potatoes can be added to the upma to make it more nutritious. My little one love peas and I happened to have sprouted green peas on hand which is why it has been added.

Check out the Blogging Marathon page for the other marathoners doing BM#16.
This post goes to Smitha who is hosting Kids' Delight this month 


Friday, May 25, 2012

Cucumber snake

Making children eat nutritious food is a humongous task. Here is a fun way to get your kids involved in making something that looks interesting....and since they "made" it, they will be tempted to eat it too.

What you need:
Cucumber slices - cut into half moons (cut a circle and then cut it into half)
Arrange cucumber slices as shown in the picture. Cut two thin slivers of tomato to make a forked tongue and use a pepper corn for the eye. That's it.....sprinkle some salt on it if your kiddo likes it that way, stand back and enjoy the glee on their face.

Check out the Blogging Marathon page for the other marathoners doing BM#16.
This post goes to Smitha who is hosting Kids' Delight this month

Wednesday, May 23, 2012

Panakam - a traditional summer cooler

The older generations truly are wise.....they have come up with recipes that use locally and seasonally available ingredients that have a host of health benefits. Panakam is one such drink that is cools the body while at the same time providing us with much needed energy and minerals (mainly iron).
I associate this drink with Sri Rama Navami - the birthday of Sri Rama, believed by Hindus to be the seventh incarnation of Vishnu. On the nine days preceding and culminating in Sri Rama Navami, the Rama temple in our town would be at its festive best. A temple chariot would be taken out every day and pulled by devotees around the town, with regular stops made at all the homes on the way. Each home would make offerings to the God. Panagam is one of the offerings that is popularly made. Not only is it supposed to be a favourite with the God, it also works as a great thirst quencher for all the people who pull the chariot and for the devotees who have traveled long distances to see the festivities. It is usually made in huge steel vessels and served to all passersby after being offered to the Lord.

What you need:
Jaggery - powdered/grated - 1 cup
Water - 6 cups (adjust depending on how sweet you want the drink to be)
Dry ginger powder/chukku podi - 1 tsp

Making this drink is a breeze. All that you have to do is mix all the ingredients well and then chill for a few hours. That's it - a healthy, nourishing and all natural thirst quencher and summer cooler is ready.

This is my first post for Blogging Marathon #16, themed on Kids' Delight - What kids love for summer. It goes to Smitha who is hosting Kids' Delight this month. This also goes to Sangee's Show me your HITS-Iron rich foods, being hosted this month at Erivum Puliyum.
Check out the Blogging Marathon page for the other marathoners doing BM#16.

Sunday, May 06, 2012

Ragi Adai for a Virtual Bridal Shower

Blogging brings us close to so many people. People that we have never met face to face become virtual friends.....we share our joys and sorrows with them.
Aarthi of Yummy Tummy is one such blogger buddy who has an amazing collection of recipes with detailed step-by-step instructions and pictures. She is getting married later this month and the Blogging Marathon team is holding a virtual bridal shower for her. What better way to show her how much we appreciate her than by cooking a dish from her blog? I have followed her recipe almost to the T, except for a few small changes.
Aarthi, this is for you......Wish you a very happy married life.


Ragi Adai - What you need:
Ragi(finger millet in English) flour - 1 cup
Water - 1.5 cups
Salt - to taste
Oil - 2 tsp
Mustard seeds - 1 tsp
Broken urad dal - 1 tsp
Green chilli - 2, finely chopped
Onion - 1, finely chopped
Carrot - 1, grated
Curry leaves - a few, chopped

Heat oil in a pan. Add the urad dal and mustard seeds. When the seeds pop, add curry leaves, green chilli and onion. Saute on a low flame till the onions turn translucent. Add carrot and saute till soft. Now add water and salt and bring it to a boil. Reduce the flame and add the ragi flour little by little, stirring continuously to ensure that no lumps are formed. Keep stirring until it comes together to form a firm, soft dough.
Set aside to cool.
Oil a plastic cover.
Take a  small ball of the dough and pat it into a circle on the oiled plastic sheet. Heat a tawa. Transfer the patted adai on to the tawa. Cook on medium flame until the under side turns a dark, glossy brown. This takes about a minute. Turn over and cook the other side too until dark brown.

Serve hot with any tangy, spicy chutney.
 

Friday, April 20, 2012

Hot red chilli chutney

I am going to let you in on a secret today. While my cooking skills have vastly improved compared to what they were like when I started cooking, I still do slip up every once in a while and make certain errors of judgement. If you need proof of that, go read this post where I inadvertently end up making glue.
If you need further proof, all that you have to do is continue reading this post.
The markets in Bangalore sell an amazing looking red chilli. These are not dried chillies, but fresh, ripe chillies that are a beautiful red.

After buying a packet full of these because they looked so good, I let them languish in the fridge because I had no idea what to do with them. Finally, one fine day, I decided that i would make a chutney with these chillies to go with dosa.
I chopped up about 8 of those chillies and sauted them in oil as I had heard that sauteing chillies in oil takes away some of the heat. While the chillies were kept aside to cool,  I  ground tamarind, jaggery, garlic, cumin seeds, salt and curry leaves  into a fine paste. The chillies were added to the paste and once again ground in the blender.
The chutney looked just as gorgeous as I thought it would look.

 I served heaped spoonfuls to hubby and myself and sat down to eat. The husband started eating and his smile sort of froze as soon as he had his first taste of the chutney. He then kept taking progressively lesser and lesser amounts of chutney until finally, he pushed the chutney aside and gulped down what seemed to be a whole bottle of water. This didn't deter me in any way. I had made this chutney and I was definitely going to eat it, come what may. I added a huge helping of jaggery to the chutney and tried eating it that way. Despite my pride, I couldn't eat any more than the husband did. Finally, I learned that there is truth in the maxim - Appearances can be deceptive.

Check out the Blogging Marathon page for the other Blogging Marathoners doing BM#14

Green gram & Corn pulav

Green gram is one of the lentils that I sprout almost every week. It is very easy to sprout and highly nutritious too. This afternoon, for lunch, I paired sprouted green gram with sweet corn to make a delicately spiced and fragrant pulav.
 
What you need:
Rice - 1 cup
Sprouted green gram/green moong - 1 cup
Corn kernels - 1 cup
Ginger - a one inch piece
Green chilli - 1 (adjust to taste)
Onion - 1, chopped fine
Garam masala - 1 tsp
Salt - to taste
Corriander/Cilantro - 2 tbsp, chopped
Butter/ghee - 1 tbsp

Grind the ginger and green chilli to a coarse paste or crush it using a pestle.
Heat butter in a pressure cooker. Add the ginger-chilli paste to it and saute for a minute on a low flame. Add the chopped onions and saute until pink.  Add the sprouted gram, corn, rice, garam masala and salt. Stir to mix well. Add 2 cups of water and cook until one whistle.
When the steam settles down, fluff with a fork and garnish with finely chopped corriander.

Enjoy!

Check out the Blogging Marathon page for the other Blogging Marathoners doing BM#14

Fried Rice - Chinese style

Every city and town in India has its own version of Chinese food. Never mind that no person from China would recognize even half these dishes. I myself have tried several versions of 'Chinese' Fried rice. This is one version that I saw on a TV channel, recreated the same day and liked a lot.
What you need:
Carrot - 1, medium sized, chopped into thin long pieces
Capsicum/Bell pepper - 1, chopped into thin long pieces
Beans - 7-8, chopped into thin, long pieces
Leeks - 1/4 cup, chopped
Celery - 1/2 cup, chopped
Green chilli - 2 or 3 (adjust to taste)
Salt - to taste
Soya sauce - 1 tbsp
Spring onion - 1/4 cup, chopped
Onion - 1, chopped thin and long
Rice - 1 cup (I used a variety of rice called jeera rice)

Wash and soak the rice in plenty of water for 30 minutes. Drain and keep aside. Heat 2 tbsp of oil. Add onion and green chilli. Saute for 2 minutes and then add the leeks and celery. When the onions turn transparent, add capsicum, carrot, beans, soya sauce and salt. Stir well, cover and cook on a low flame. You do not have to add any water at this point as the vegetables in combination with soya sauce and salt will release water and cook beautifully. When the vegetables are cooked, remove from heat and keep aside. Heat 1 tbsp of butter in a pressure cooker. Saute the soaked rice along with some leeks, celery and spring onion. Add salt and water. The rice that I used requires two cups of water for every cup of rice. The amount of water to be used will depend on the quantity, quality and type of rice used. Cook until one whistle, reduce the flame and cook for another five minutes. Fluff with a fork and set aside to cool. Mix the cooked veggies and the rice well. The final step in putting the rice together might seem quite unnecessary, but it is essential to make sure that the flavours of the vegetables and the rice blend together well. In the final step, heat 2 tbsp of oil in a pan. Add some spring onion and the rice to this. Stir well until heated through. Enjoy!!! Check out the Blogging Marathon page for the other Blogging Marathoners doing BM#14

Wednesday, April 18, 2012

Easy chocolate layered cake

Though I have been baking cakes for a while now, I have shied away from baking layered cakes and also from icing the cakes. I always thought that icing is not something that is easy to do. I would drool over pictures of fellow bloggers' cakes with perfect, melt-in-your-mouth kind of icing on top. I recently conquered my fear of both - baking layered cakes and of making icing at home, realizing in the process that it is not a very difficult task if you have good quality ingredients on hand.

What you need:
For the chocolate cake: (Recipe source : Adapted from the Hershey's website - www.hersheys.com)
All purpose flour - 3 cups
Dark chocolate cut into small pieces - 1.5 cups (I used Morde)
Water - 2 cups
Baking soda - 2 tsp
Buttermilk - 2 tbsp (Original recipe calls for white vinegar)
Sugar - 1.5 cups
Salt - 1 tsp
Vegetable oil - 2/3 cupshttp://www.blogger.com/img/blank.gif
Vanilla extract - 2 tsp

Preheat oven to 180 degree centigrade. Grease two nine inch round cake pans.
Mix together flour, sugar, salt and baking soda in a large mixing bowl.
Heat chocolate in the microwave (medium power) for two minutes or until it melts when stirred. Cool a little and then add it into the mixing bowl. Add all the other ingredients and mix with a hand blender until well blended.
Pour the mixture into the greased pans and bake for 30 - 35 minutes or until a skewer inserted in the middle comes out clean.
Cool completely.

For the whipped chocolate cream frosting : (Recipe source - Divya's Easy cooking)
Dark chocolate - 1/2 cup
Cream - 2 cups (I used Nilgiris cream)
Sugar - 3 tbsp
In a large, thick bottomed sauce pan, boil the cream and sugar. Switch off the heat and then mix in the chopped chocolate. Stir until the chocolate melts completely. Let it cool to room temperature and then refrigerate for at least 4 hours.
Whip the cream over an ice bath at medium speed until soft peaks begin to form. Refrigerate until you are ready to use it.
This is the part that made me happiest. I couldn't believe how easy it was to do this and how wonderful the whipped cream tasted.

For the chocolate glaze : (Recipe source - adapted from the Hersheys website)
Grated dark chocolate - 2 tbsp
Butter - 2 tbsp
Water - 2 tbsp
Sugar - 2 tbsp (Original recipe calls for 1 cup, but I felt it would make the cake too sweet)
Melt butter in a pan. Add sugar, chocolate and water. Cook on a low flame, stirring constantly until it forms a smooth, slightly thick paste. Take care to not let it boil. Let it cool to room temperature.

Putting the cake together:
Place on of the cakes on the serving platter Spread 1/3rd of the whipped chocolate cream frosting on it evenly. Place the other cake on top. Now cover the top and sides with the remaining frosting.
Pour the glaze on top of the cake, letting some of it run down the sides.
Refrigerate until ready to serve.


Check out the Blogging Marathon page for the other Blogging Marathoners doing BM#14

Tuesday, April 17, 2012

Dabeli masala

The variety of street food that is on offer in India is mind boggling. Each state has its own kind of street food - something special that is only available on the road sides and not in fancy restaurants.
If you happen to be in Bangalore, do take some time out to visit Thindi Beedhi which is in VV Puram. It is a street dedicated to food. The name literally means Food Street. You will find huge crowds thronging the small street on weekends, vying for dosas, super soft idlis, chaats, badam milk and sweets. There is a chaat shop here that I really like. The dabelis in this shop are always in huge demand.
Dabeli is a street food from the state of Gujarat. It literally means pressed. With potatoes, sweet and sour chutney, spicy chutney, pomegranates and sev stuffed into burger buns, this is nothing short of a delightful explosion of flavours. The potatoes are cooked with a dash of special dabeli masala, which is the recipe that I have for you today. (Recipe source : Tarla Dalal)

What you need:
Red chilli - 1
Corriander seeds - 1 tsp, heaped
Cumin - 1/4 tsp
Clove - 5 or 6
Cinnamon - a medium sized piece

Dry roast all the ingredients in a kadai over a low flame for 2-3 minutes until the spices turn reddish brown.
Let it cool and then powder in the small jar of your blender.

This makes a small quantity, just enough for a single use.
Check out the Blogging Marathon page for the other Blogging Marathoners doing BM#14

Monday, April 16, 2012

Creamy Pasta in white sauce

A few weeks back, the little girl went to a friend's birthday party and came back raving about the W.O.N.D.E.R.F.U.L creamy pasta that she ate there. The only help I got from her in helping me to figure out what made it so wonderful is that it was creamy and non spicy and that she loved it. Not one to miss out on a opportunity to feed her something that she likes, I too decided that I would make pasta for dinner.

What you need:
Pasta - any kind - 2 cups, cooked as per package instructions. (I used macaroni as the little girl is partial to it)
Mixed vegetables - of your choice - chopped into thin, long pieces and cooked. (I used carrots and beans, though the usual choices are broccoli and bell pepper)
Garlic - a few cloves
Celery - some, finely chopped
For the sauce:
Butter - 4 tsp
All purpose flour - 4 tsp
Milk - 1/2 litre - approx 3 cups
Onion - chopped fine
Black peppercorns - 5 or 6
Cloves - 5
Bay leaf - a small piece

To make sauce:

Melt the butter in a small saucepan. Add the flour to it and stir over a low flame to make a smooth paste. The colour of the flour should not change. Remove from heat and set aside.
Heat milk in a thick bottomed pan. Add half the chopped onion to it along with peppercorns, cloves, garlic and bay leaf. When the milk boils, add the flour paste to it. Whisk over a low flame. When the mixture thickens, remove from heat and strain.

Assembling the pasta:
Heat some butter in a pan. Saute the finely chopped onion, garlic and the cooked vegetables. Add the cooked pasta, pasta sauce and salt as required. Heat till the pasta is well coated with the sauce.
Garnish with finely chopped celery/parsley.
Serve hot with some crushed pepper sprinkled on top.

This is my first post for the Blogging Marathon under the theme "Cooking by the Alphabet".
Check out the Blogging Marathon page for the other Blogging Marathoners doing BM#15