Pages

Wednesday, January 11, 2017

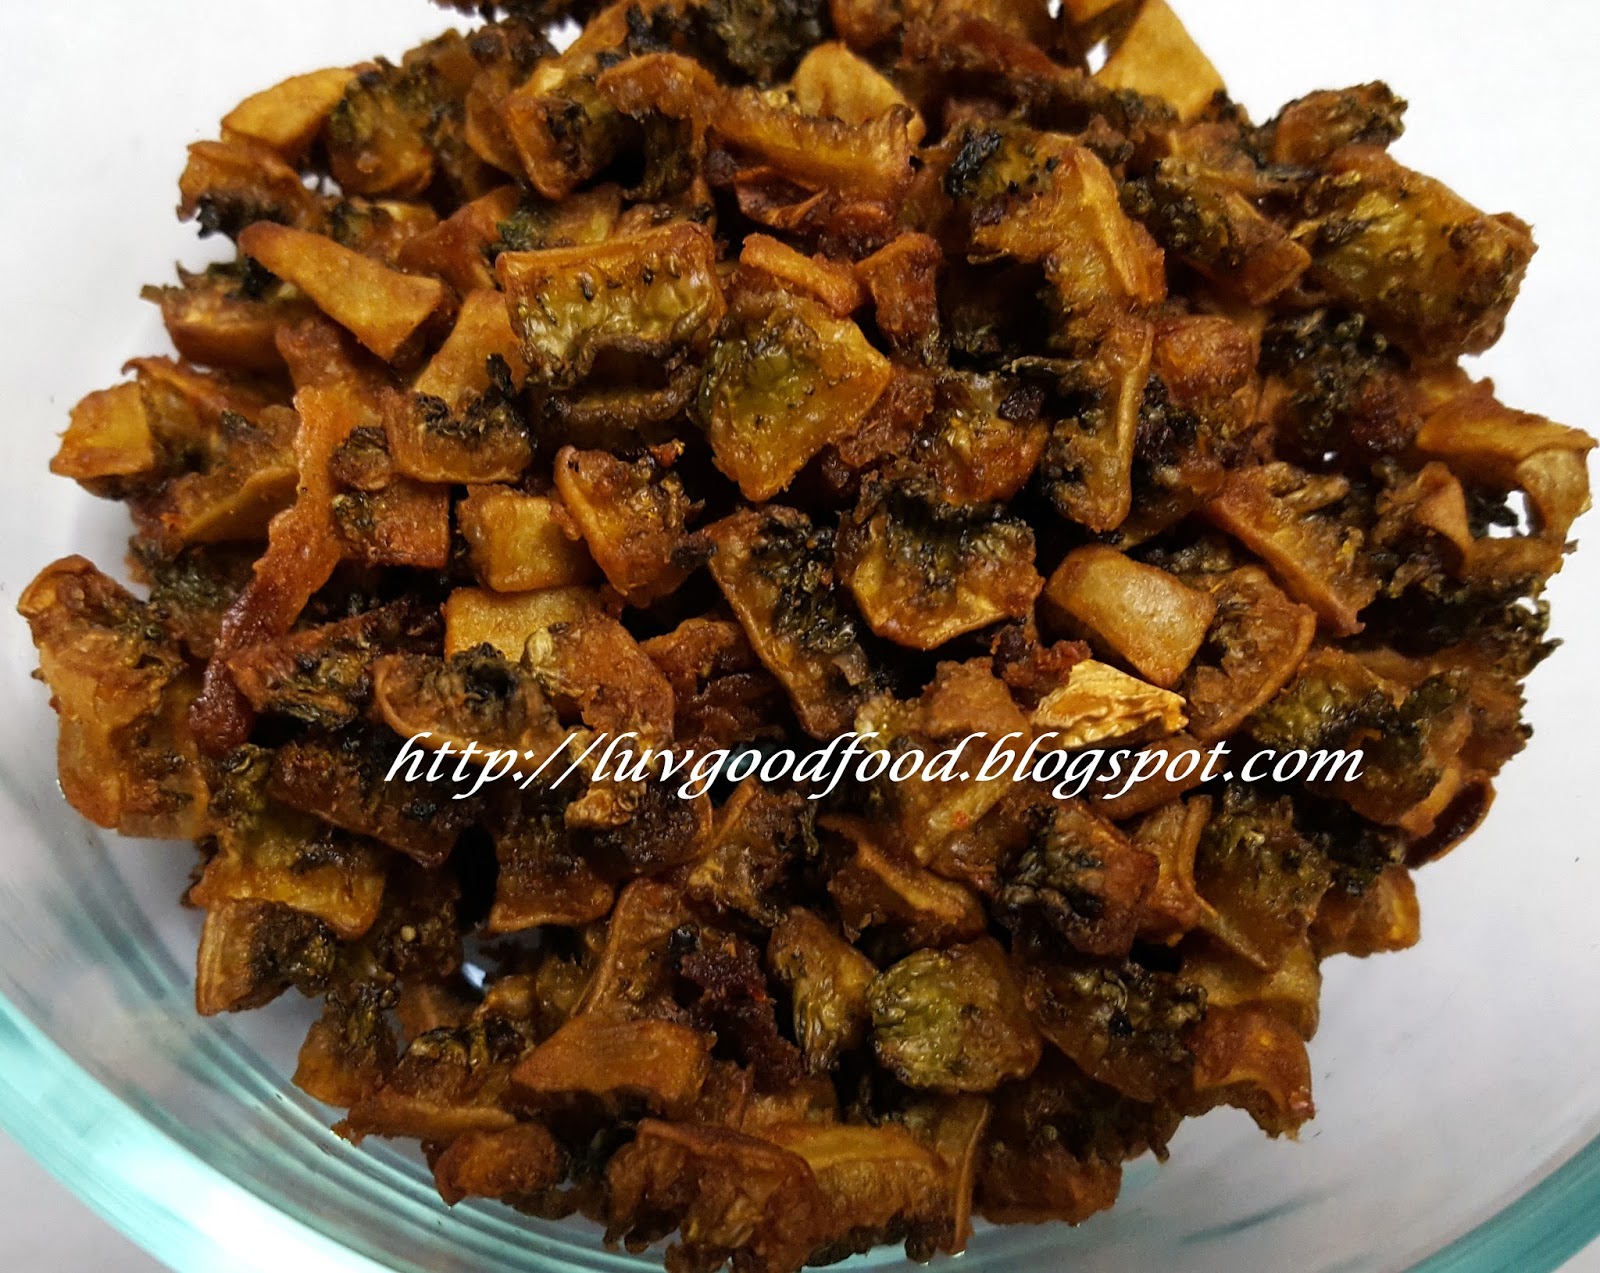
Pavakka varuval (Crisp, fried bittergourd)

If you've read some of my previous posts, you know that we are a family that loves bittergourd. Even the little girl loves this veggie and will eat it in any form.
Marinated in spices and then deep fried, this dish will make you fall in love with this much maligned vegetable. The only things to keep in mind are that it takes a good 20 to 30 minutes on a medium flame to fry these bittergourds to the right crispness, and that the oil in which you deep fry these gourds cannot be used again for deep frying something else as it will have the residue of all the spices. So, you either have to discard it or use it for tadkas.
My dinner today was phulkas, chard dal and pavakka varuval. This is my second post for Week 2 of Blogging Marathon #72 under the theme Vegetarian dinners.

What you need:
Bittergourd - 4
Red chilli powder - 1 tsp
Turmeric powder - 1/2 tsp
Tamarind - 1 tbsp soaked in just enough hot water to cover it
Salt
Oil - for deep frying

Cut each bittergourd into half. Then slice each half vertically into two. Deseed and then cut into chunks. Don't cut them too thin, as they will shrivel up considerably on frying.
Take the bittergourd pieces in a large bowl. Add salt, turmeric and red chilli powder. Mix in thick tamarind extract. Mix it all together well. Cover and set aside for at least half an hour.
Drain any liquid that has collected in the bowl, squeeze out any excess liquid and then add handfuls of the bittergourd to hot oil and deep fry over a medium hot flame until it turns brown.
Remove on to a paper towel.


This tastes good by itself or as a side dish for rotis or rice.
Check out the Blogging Marathon page for the other Blogging Marathoners doing this BM

Tuesday, January 10, 2017

Puri masala

The weather here in Minnesota is getting colder by the day. Today, I drove through roads where I was not able to see the lines that mark the lanes or distinguish between the sidewalk and the road. This kind of weather makes me long for tea that is spiced with ginger and cardamom and deep fried snacks. Puris make an appearance at our dinner table on days like this. My favorite accompaniment for puris is this simple yet very flavorful potato masala that is served in restaurants in South India. With just a few ingredients and a bit of your time and supervision, you can make this curry which you cannot go wrong with.


What you need:
Potato - 3 or 4, medium sized (boiled, peeled and mashed)
Onion - 1, chopped fine
Green chillies - 3 or 4, slit into half vertically
Ginger - a small piece, chopped fine
Turmeric powder - 1/2 tsp
Oil - 2 tbsp. (* See note)
Mustard seeds - 1/2 tsp
Chana dal - 1/2 tsp
Urad dal - 1/2 tsp
Curry leaves - a few
Salt - to taste
Juice of half a lemon

Heat oil in a pan. Add chana dal, urad dal and mustard seeds. When the seeds pop, add the slit green chillies, ginger and curry leaves. Saute a bit and then add the chopped onion. Saute on a low flame until the onions turn translucent.  Add turmeric powder and the mashed potatoes. Mix well and stir in a cup of water and salt as per your taste. Let it boil for a few minutes until the masala thickens. Switch off the heat and mix in the lemon juice.

Serve hot with puris.

Note : * I am partial to coconut oil and think that it imparts a characteristic flavor to this masala. However, any oil will serve the purpose.

This is my entry to the second week of Blogging Marathon #72, under the theme Vegetarian dinners.
Check out the Blogging Marathon page for the other Blogging Marathoners doing this BM

Friday, January 06, 2017

Chocolate chip cookies

There are some dishes that you can always create in your kitchen with perfection and, seemingly, with no effort. A chocolate chip cookie is not one of them. It is one of those things where the end product can sometimes end up too soft and gooey, or too crisp or at times, brown so much that it starts to smell charred well done. There's no easy way around this one. You must try, try and try again until you have that perfect recipe. And once you do, you write it down so that you won't forget the measurements you used and then, you can recreate that perfect cookie any time you want to.
This recipe that I am sharing with you today is an adaptation of one such recipe that I came across in a book called Sensational Cookies by Linda Amendt. Following this recipe will yield cookies that are soft, chewy and just right.


What you need:

All purpose flour - 1 cup
Baking soda - 1/2 tsp
Salt - a pinch
Sugar - 3/4 cup
Butter (softened, at room temperature) - 1/2 cup
Egg - 1
Vanilla extract - 1/2 tsp
Chocolate chips - 1 cup

Preheat oven to 350 degree Fahrenheit.
In a large bowl, cream the butter and sugar together until light and fluffy. Add in the egg and beat well to mix. Mix in the vanilla. Then slowly add the flour, baking soda and salt and mix with a spatula until well combined. Fold in the chocolate chips.
Line a cookie sheet with parchment paper. Drop tablespoonfuls of the dough onto the cookie sheet, leaving at least 2 inches between each cookie, as these cookies will expand while baking.
Bake for 12-15 minutes, or until the edges of the cookies start to turn a light brown.
Remove onto a cooling rack and let it cool completely before storing in an air tight container.

This is my second recipe for Blogging Marathon #72 under the them Kids' Delight - Cakes & Cookies. Check out the Blogging Marathon page for the other Blogging Marathoners doing this BM
This recipe also goes to Kids' delight event hosted by Vidhya’s Vegetarian Kitchen and run by Srivalli – Spice Your Life!

Thursday, January 05, 2017

Black forest cake (Eggless)

When I was growing up, cakes were not very common. There were plum cakes for Christmas, but other than that, we hardly ever ate much cake. For birthdays, the standard fare was always payasam and a sadya - very rarely did the celebration involve cutting a cake. The few birthday cakes I remember eating were all iced with flowers that looked bright, colorful and beautiful, but were really hard to bite into. Now, with a profusion of flavors, frostings, toppings and fillings to choose from, I find that I prefer simple flavors and minimal frosting.
For the last few years, I have been baking the new year cake for the get-together that me and my friends host on new year's eve. This year, I made a crowd favorite - an eggless black forest cake.


What you need:

Basic chocolate cake - 1
Whipped cream ( 1cup of heavy whipping cream + 5 tbsp. of sugar beaten at high speed till stiff peaks form)
1 jar of canned cherries
Chocolate shavings

With a serrated knife or a cake leveler, cut the cake into two layers. Place the bottom layer on the cake board. With a pastry brush, apply some of the canned cherry syrup all over the cake. Alternatively, you can use sugar syrup too. Evenly spread a layer of whipped cream on this layer and top it with some chopped cherries. Place the second layer of cake on top of this. Apply cherry syrup over it and then spread whipped cream on top of it. Frost the sides of the cake and smooth the icing with an offset spatula. Top the cake with some cherries and chocolate shavings.

This is my second recipe for Blogging Marathon #72 under the them Kids' Delight - Cakes & Cookies. Check out the Blogging Marathon page for the other Blogging Marathoners doing this BM
This recipe also goes to Kids' delight event hosted by Vidhya’s Vegetarian Kitchen and run by Srivalli – Spice Your Life!

Tuesday, January 03, 2017

Basic chocolate cake (No egg - uses egg replacer)

A basic chocolate cake recipe is a must have in every baker's repertoire. This recipe is one that I use frequently as the base for my cakes. It tastes great as it is, and even better dressed up with whipped cream, ganache or chocolate buttercream. With a few modifications, it can also be turned into a delicious black forest cake.

Basic chocolate cake frosted with chocolate buttercream

What you need : (Makes one 8 inch cake)
Cake flour - 3/4 cup
Sugar - 1 cup
Cocoa powder - 4 tbsp. (heaped)
Baking powder - 3/4 tsp
Baking soda - 3/4 tsp
Salt - a pinch
Ener-G egg replacer powder - 1.5 tsp (Mix this powder with 2 tbsp. of warm water and blend till frothy)
Oil - 1/4 cup
Milk - 1/4 cup
Warm water - 1/2 cup
Vanilla essence - 1 tsp

Preheat oven to 350 degrees Fahrenheit.
Grease and line an 8 inch round cake pan with parchment paper.
Sift all the dry ingredients into a large bowl. Add in the wet ingredients and mix well. Pour into the cake pan and bake for 25-28 minutes or until a toothpick inserted into the cake comes out clean.
Let it cool in the pan and once completely cooled, slice and store in an air tight container in the refrigerator.

I am beginning this year by participating in the Blogging Marathon. This week, I will be posting recipes under the theme Kids' Delight - Cakes and Cookies.
Check out the Blogging Marathon page for the other Blogging Marathoners doing this BM
This recipe also goes to Kids' delight event hosted by Vidhya’s Vegetarian Kitchen and run by Srivalli – Spice Your Life!


Wednesday, May 25, 2016

Challah - a beautiful braided bread

Challah is a Jewish braided bread made and eaten on Sabbath and some other Jewish holidays. Most versions I have seen of this bread are sweet, with cinnamon and raisins being popular additions to the dough. Since I made a sweet bread yesterday, I have made a non sweet version of the Challah for my second post for Blogging Marathon #64.


What you need :
All purpose flour - 2 cups
Lukewarm water - 1/2 cup
Instant yeast - 1 tsp
Salt - 1 tsp
Oil - 1/8 cup
Egg - 1

In a large bowl, whisk together the yeast, water, oil and egg.
Add the flour to this, a little at a time and knead to a smooth pliable dough. My dough was very sticky and I had to add an additional 3 tbsp. of flour to make it smooth and non sticky.
Transfer the dough to a well oiled bowl and  turn it over a few times so it is coated with oil on all sides. Cover and let it rise until doubled in volume (about an hour).
Punch down the dough and separate it into three portions. Roll each portion into a longish rope (about 15 inches or so). These will form the three parts of the braid.
At this point, you can make a savory stuffing and stuff it into each segment. I made a really tasty tomato, onion and garlic filling. However, for some reason, after I flattened one of the strands and put in some of the filling, I just wasn't able to close the ends together. No matter how hard I tried, the ends just wouldn't stick together. Not sure why that happened. So I took the stuffing out, patted the dough with some paper towels to absorb the extra moisture from the stuffing and then proceeded to braid the bread.
To braid the bread, place the three dough ropes side by side and pinch the top of the three ropes together. Now, start braiding the bread just as you would braid hair or rope until you reach all the way to the bottom of the strands. In the end, knot the three ropes together and tuck them under so that you have a neat braid.
Cover with a wet towel and leave it to rise for 30 - 40 minutes.
Brush some milk on top of the bread and sprinkle the top generously with fresh/dried herbs. I used dried Italian seasoning.
Bake at 375 degrees Fahrenheit for 25-30 minutes or until the top turns a nice golden brown.
Slice and serve when warm.

Check out the Blogging Marathon page for the other Blogging Marathoners doing this BM

Tuesday, May 24, 2016

Khaliat Nahal - Honeycomb buns

Khaliat Nahal, which in Arabic means bees' hive, derives its name from the typical honey comb like pattern in which this bread is baked. It can be made either sweet or savory. I have made the sweet version with its traditional cream cheese filling, and coated it with sugar syrup after baking.
This recipe makes 17/18 smallish buns. The buns are baked close together in a round pan, giving it its characteristic honey comb shape. The recipe is one I'd bookmarked when I was part of the We Knead to Bake group and thanks to Blogging Marathon #64 where I'll be posting three different shaped yeasted breads this week, it is finally moving out of my bookmarks folder and seeing the light of day.

Khaliat Nahal - Honeycomb buns
What you need:
All purpose flour - 2.5 cups
Sugar - 3 tbsp.
Salt - 1/4 tsp
Instant yeast - 1.5 tsp
Melted butter - 3 tbsp.
Lukewarm milk - 1 cup
Cream cheese - for filling
Some milk for brushing on top of the buns

For the sugar syrup:
Sugar - 3/4 cup
Water - 1/2 cup
Lemon juice - 1 tsp

Mix the melted butter, flour, sugar, salt and yeast using your finger tips. Add the milk, a little at a time and knead until your dough is smooth, pliable and elastic. You may not have to add all the milk.
Coat with a little oil on all sides, cover and leave aside in a warm place to rise. It should double in size in about an hour.
While the dough is rising, you can make your sugar syrup. To do this, bring the sugar and water to a boil and then let the mixture simmer on low heat for a few minutes until it starts to thicken. Remove from heat and add the lemon juice. Keep aside to cool until needed.
Once the dough rises, divide it into two parts. Roll each part into a rope that is roughly 9 inches long. Cut each rope into nine parts, so that you have eighteen parts in all. Flatten each part of dough a little, place a little of the cream cheese inside and close the seams and smoothen the dough into a round ball. Place the balls of dough in a well greased 9 inch round pan, arranging them in concentric circles, filling the base of the pan. Cover with a wet paper towel and let it rise for about an hour. Brush the tops with milk.
Bake in a preheated oven at 350 degrees Fahrenheit for about 25 minutes or until the tops are well browned.
Remove from the oven and while the buns are still hot, pour the sugar syrup on top of them. If you want your bun to be only mildly sweet and not sticky, you could just brush the sugar syrup on top of the buns. Let this sit for a bit so that the sugar syrup sets a little.
Serve warm.

Check out the Blogging Marathon page for the other Blogging Marathoners doing this BM

Friday, May 13, 2016

Kovakka pickle

Pickles, especially of the instant kind, are a must have in my home. Whether to spice up a breakfast or to pair with curd rice while winding down for the day, nothing beats the comfort of a good home made pickle. This kovakka/tendli/ivy gourd pickle is quick and easy to make and scores high on the taste factor too.


What you need :

Kovakka/tendli/ivy gourd - 25-30 (use firm green ones. Do not use ripe ones)
Juice of half a lemon

Dry masala :
Red chilli powder - 1 tsp, heaped
Pickle masala powder - 1 tsp heaped
Turmeric powder - 1/2 tsp
Salt - 2 tsp
Fenugreek powder - 1/2 tsp
Mustard powder - 2 tsp
Cumin powder - 1/2 tsp

For tempering:
Gingely oil - 5 tbsp.
Mustard seeds - 1 tsp
Broken red chilli - 1
Cumin - 1/2 tsp
Asafoetida

Wash and dry kovakka using a paper towel. Cut each gourd into half vertically and then cut each half into three thin strips, making six strips out of each gourd.
Heat a teaspoon of oil in a kadai and on a low flame, fry the kovakka for about five minutes until it is just slightly done. Do not cover the kadai while frying, as we don't want the kovakka to be cooked through. It should still retain its crunch. Switch off the flame and let it cool to room temperature.

Mix all the ingredients listed under the dry masala in a separate vessel. Add this to the cooled kovakka and mix well.

Heat oil for tempering. Add mustard seeds, red chilli, and cumin. When the mustard seeds pop, sprinkle some asafoetida in the oil, switch off the heat and add the masala coated kovakka. Mix well. Squeeze the juice of half a lemon into this and mix well.
Let it cool completely. Store in an air tight bottle.

This is my second post for Blogging Marathon #64 under the theme Pickles & Preserves. The recipe is from here.
Check out the Blogging Marathon page for the other Blogging Marathoners doing this BM#64


Wednesday, May 11, 2016

Plum jam

Making jam at home is not a difficult task. It is something for when you have lots of time on hand, though. You cannot hurry through it and there are no short cuts you can take. If you want your jam/preserve to last for a long time, then you must painstakingly follow the procedure and let it take its own time. This plum jam was made when plums were in season and this is my first entry for Blogging Marathon #64 under the theme Pickles & Preserves.


What you need :
Plum - 8 large, pitted and chopped (approx 4 cups)
Sugar - 1 cup, heaped
Time and Patience - immeasurably large amounts

In a large sauce pan, combine the chopped plums and sugar. Stir with a spoon and set aside for at least an hour. This helps the sugar to dissolve and the plum to release its juices.
Now bring the plum sugar mixture to a boil and then simmer on low heat for 10 minutes, stirring occasionally. Remove from heat and let it come to room temperature. Repeat this step a total of four times, mashing the plums with the back of your spoon each time to get a chunky texture. If you don't want chunks in your final product, you could blitz it with a hand blender or blend it in your blender for a smoother texture. After simmering the mixture the fourth time, pour it into a sterilized, still hot glass jar, seal and allow to come to room temperature. This can be stored at room temperature until it is opened. Once opened, store in the refrigerator.

How to sterilize your glass jam jar :
Stand the glass jar upright in a large container of water. There must be enough water to cover the jar completely and then some. Bring the water to a boil and continue boiling for 15 minutes. Switch off heat and put the lid of the jar and the tongs you will be using into the water. Let it stay immersed for 10 minutes. Remove everything onto a clean paper towel and let stand for 1 minute. Pour the jam into the bottle while the bottle is still hot to avoid cracking.

Check out the Blogging Marathon page for the other Blogging Marathoners doing this BM#64


Tuesday, January 26, 2016

Random thoughts - whose job is cooking anyway?

Recently, I've noticed this trend in media where the onus of what was once thought of as a woman's domain is now being shifted on to men. Specifically, there is this ad that seems to have become very popular, acquiring several 'likes' from men and women alike, where a father asks the groom's family whether he knows how to cook and on him answering in the negative,  how they expect his daughter to survive on noodles alone. The ad ends happily with the 'boy' asking the girl's family to come and visit him in ten days, in which time, he hopes to learn how to cook something good enough for the girl.
While I am as much of  a believer in equal rights for women as the most ardent of feminists, this advertisement struck me as wrong on so many counts. First off, cooking is a life skill - and both men and women should know enough of it to be able to survive on their own. Secondly, shifting the responsibility of cooking from one gender to another doesn't solve the problem of gender bias. It only changes the angle of bias. Similarly, whether you do 'ladki dekhna'(bride seeing) or 'ladka dekhna'(groom seeing - which in practice, never happens), the process is nothing but regressive at its best.
 In an ideal world, men and women (not boys and girls) would find their own partners when they are ready to, and cooking would be something that whoever enjoys it on a particular day does. It wouldn't be any one partner's duty to ensure that hot food is served at the table at pre-fixed times.
Sigh!!! If only ideals matched reality!!!

Wednesday, January 20, 2016

Kaima idli - Deep fried idli coated in a spicy veggie masala

Kaima idli, chilli idli, fried idli, idli chilli - the monikers are numerous, but what they all refer to is this delectable dish that is made by first deep frying idli pieces and then, if you can resist the temptation of polishing off the plate of fried idli,  coating them with a spicy mix of vegetables.
I first tasted this dish at Saravana Bhavan in Chennai and believe me, it was nothing short of an explosion of flavors on the tongue. Since then, I have eaten this innumerable times at different restaurants and loved all the variations that the chefs with their individuality have brought to the dish. Here is my take on this dish. I have created a collage of the various steps involved in the preparation of this dish so that it can be recreated with ease by anyone who wishes to try it out.


What you need :

Idli - 8, diced
Onion - 1/2 of a large one, sliced thin and long
Green chilli - 2
Carrot - 1/2, grated
Capsicum - 1/2, chopped fine
Ginger - a small piece, julienned
Garlic - 3 cloves, chopped fine
Tomato - 1, chopped
Oil - 3 tbsp.
Mustard seeds - 1/2 tsp
Urad dal - 1/2 tsp
Chana dal - 1/2 tsp
Oil - for deep frying
Salt
Turmeric powder - 1/4 tsp
Red chilli powder - 1 tsp (adjust to taste)


Dice the idli into pieces. It helps if you refrigerate the idli for at least an hour. Deep fry the cut pieces in hot oil until brown and crisp. Drain off excess oil an set aside.
Heat 3 tbsp. of oil in a pan. Add mustard, urad dal and chana dal. You can also throw in some curry leaves at this point. I skipped that as I didn't have any on hand. When the mustard seeds pop, add the chopped green chilli, ginger and garlic and saute. Lower the heat and add in the sliced onions. Saute until the onions turn pink. Add the grated carrot and capsicum. Stir well and cook covered for a few minutes until the capsicum starts to soften. Add in the chopped tomato, red chilli powder, turmeric powder and salt. Stir well and cook covered until tomatoes turn mushy. Add 1/4 cup of water and let it boil for a minute or two or until most of the water has evaporated. Now add in the fried idli pieces and mix to coat well with the vegetable masala. Remove from heat and garnish with some freshly chopped coriander leaves.
Serve hot immediately or after a while - the only difference will be that if served immediately the idli pieces will retain their crunch, while if eaten later they will be slightly softened by the moisture from the masala. Either way, it will be a treat for your taste buds.

Thursday, November 05, 2015

Mixed vegetable salad with a tangy spicy dressing

Of the three salads that I've made for Blogging Marathon #58, this one is my favourite. Loaded with colorful vegetables and crunchy toasted peanuts, this salad hits the right notes with a dressing that is tangy, spicy and mildly sweet.


What you need :
Cucumber - 1, peeled and cut into long, thin strips
Carrot - 1, cut into thin long strips
Tomato - 1, cut into thin strips
Onion - 1/2 of a small one, sliced fine
Capsicum - different colors - sliced thin and long, 1/4 cup
Corriander - a handful, chopped fine
Salt - to taste

For the dressing :  (This dressing, in my opinion, is the best part of this salad. Make sure to spoon plenty of dressing over each individual serving of salad)


Tamarind - a gooseberry sized ball soaked in water. Extract 1/3 cup of thick juice from the soaked tamarind
Red chilli powder - 1/2 tsp
Sugar - 1 tsp

Mix the tamarind extract, sugar and chilli powder in a large bowl. Stir till sugar dissolves.
Add all the other ingredients to this and mix well.
Toast a handful of peanuts in half a spoon of oil. Add this to the salad and toss. Serve immediately to retain the crunch of the peanuts.

Wednesday, November 04, 2015

Apple pear walnut salad

For the second day of Blogging Marathon #58, I have a fruit and nut salad. This was relished as an after school snack by my daughter. The walnuts and apples provide a crunch to the salad and are the perfect foil to the soft, ripe pear. Lemon in the dressing gives the salad a slight tanginess which, I feel, sets of the sweetness of the fruit perfectly.


What you need :
Apple - 1, chopped
Pear - 1, chopped
Walnuts - a handful, toasted and chopped into large chunks

For the dressing :
Honey - 1 tsp
Lemon juice - to taste (I extracted juice from about 1/4 of a lemon)

Mix all the ingredients for the salad and the dressing together. Serve immediately or chilled.
Enjoy.

Check out the Blogging Marathon page for the other Blogging Marathoners doing this BM


Tuesday, November 03, 2015

Chick peas salad

I am not much of a salad person. Though I could eat a well put together salad as part of a meal, it can never be a meal by itself in my household. I am hoping to develop a liking for salads through Blogging Marathon #58 where, for the first week, I have deliberately chosen to cook and showcase salads.
The first in the series is a simple yet hearty and substantial chick pea salad with a yogurt dressing that is a reflection of my love for chaas (spiced buttermilk).

What you need:
Chick peas - 1 cup soaked overnight and cooked
Onion - 1 small, chopped fine
Potato - 1, cooked, peeled and diced
Corriander and mint leaves - a few, chopped
Black salt (kala namak) - to taste
Juice of half a lemon

For the dressing :
Thick yogurt - 1/2 cup (Greek yogurt or hung curd works best for this)
Salt
Cumin powder - 1/2 tsp

Mix all the ingredients for the dressing well and refrigerate for at least 30 minutes.
In a large bowl, combine all the ingredients for the salad. Add in as much of the dressing as you like. Mix well to combine.
Enjoy.

Check out the Blogging Marathon page for the other Blogging Marathoners doing this BM

Monday, September 28, 2015

Keerai thoran - Red amaranth stir fry


Sometimes, the most mundane of things can help bring forth the most pleasant memories. Very often, it is not the thing itself that we crave, but the fond memories associated with it that the heart yearns for.
I recently learned this profound truth when I spotted red amaranth leaves in the local farmers' market. While I have always loved the simple, earthy taste of a stir fry made with these leaves, it is only now, in the wake of having recently lost my grandmother, that I have realized how closely tied in this leaf is to my memories of her.

Some of my earliest memories as a child include her, impeccably dressed in her nine yards madisar podavai, walking to our front yard with a plate filled with tiny black seedlings. I would assist her in scattering these seeds around our coconut trees and then sprinkling water over them. I would check and water the seeds in the days to follow,my entire child's being thrilled to see the tiny shoots sprouting out of the ground. A few weeks down the line, my grandmother would harvest her crop of red keerai (red amaranth/malabar spinach) and hand them over to my mother to be cleaned and chopped. Once that was done, she would put her cheena chatti (wok) on the stove, heat some coconut oil in it, put in a simple seasoning of broken red chilli, urad dal and mustard seeds and then the chopped spinach leaves. These would cook remarkably quickly  in their own steam on a low flame. A garnish of grated coconut ground with green chillies was the final touch she added to the dish and then, knowing that this was my favourite way of eating it, she would mix it up with hot rice and ghee on a plate and hand it to me.
I now know that it is not the dish alone that I am so fond of, but the heaping helping of love with which it was made and served that I long for.


What you need:
Amaranth leaves/malabar spinach - 1 bunch (Any variety of leafy greens can be used but I am partial to the red amaranth leaves that grow particularly well in Kerala)
Oil - 1 tsp
Urad dal - 1/2 tsp
Mustard seeds - 1/2 tsp
Broken red chilli - 2
Grated coconut - 1/4 cup ground coarsely with 1 green chilli
Salt

Wash the leaves well and chop finely. Heat oil in a pan. Season with dal, mustard and red chilli. When the seeds start to pop, reduce the flame to low and stir in the chopped leaves and salt. Cover and let it cook in its own steam until wilted. Add in the ground coconut. Stir well and heat uncovered until the moisture evaporates.
Serve with hot rice and ghee.

Thursday, June 18, 2015

Cabbage pakoda/Crunchy, crisp cabbage fritters

These are easily some of the best pakodas that I've made. Easy to make, these deep fried delights stay crisp and crunchy for a really long time. The only major chore involved is chopping cabbage, which I am usually not too fond of, but the recent addition of a chopper to my kitchen makes this snack a breeze to make.

What you need :
Cabbage - a small one, chopped thin and long (I measured and got approximately 4 heaped cups of cabbage)
Gram flour/besan - 1 cup (approx)
Rice flour - 2-3 tbsp
Red chilli powder - to taste
Salt - to taste
Onion - 1/4 cup, chopped fine
Ajwain/carom seeds - 1 tsp (optional. I am fond of the flavor and tend to throw this in wherever I can)
Oil - for deep frying

Take the chopped cabbage in a bowl. Sprinkle salt over it and leave aside for 10 minutes. The cabbage would have released quite a bit of water in this time. Add the rest of the ingredients and mix well to form a thick dough. You will not need to add any extra water, but if you feel that your dough is too dry and crumbly, sprinkle a tiny bit of water and mix until it reaches a thick, just moistened consistency.
Heat oil in a kadai. Pinch out small bits of the dough and deep fry on medium heat until well browned and crisp. Drain on to a paper towel.
Serve with ketchup or chutney.

This is my second entry to Week 3 or Blogging Marathon #53 under the theme Fritters.
Check out the Blogging Marathon page for the other Blogging Marathoners doing this BM

Pavakka pakoda / Bittergourd fritters

  I have spoken previously on the blog of my love for bittergourd. The husband and daughter share this love of mine for a vegetable that unfairly often gets a bad rap. Today, I have tried to come up with a deep fried dish using this veggie, where the bitterness is only slightly evident.


What you need:

Bittergourd - 2
Gram flour - 3/4 cup (approx)
Rice flour - 1/2 cup (approx)
Red chilli powder - 1 tbsp (adjust to taste)
Salt
Oil - for deep frying

Wash and dry the bittergourd. Discard both the thin ends. Chop into thin, even discs. If the seeds are too thick and tough, you can remove them. Otherwise, you can leave them in, like I did. Add the rest of the ingredients and mix well. Sprinkle water a little at a time to get a thick dough.
Heat oil in a kadai. On a medium flame, fry the bittergourds, a few at a time until they are crisp and brown. Do not hurry this step or attempt to do it on a high flame.
Drain on to a paper towel. Enjoy as is or as a side with rice and curry.

This is my first entry to Week 3 of Blogging Marathon #53 under the theme fritters.
 
 Check out the Blogging Marathon page for the other Blogging Marathoners doing this BM

Tuesday, March 31, 2015

Potato podimas


Potato is an almost universal favourite among vegetables. Chips, fries, a simple potato roast or this equally simple podimas - it sure is one vegetable that is hard to resist. A podimas is a simple stir fry of mashed potatoes tempered with some spices and topped with a dash of lemon juice. Anyone who has grown up in a Kerala Iyer household will be able to attest to the fact that this, with rasam and pappadam, is a much loved meal.


What you need:
Potato - 2 large baking potatoes or 4 medium sized, boiled, peeled and mashed
Oil - 2 tsp
Mustard seeds - 1 tsp
Urad dal - 1/2 tsp
Turmeric powder - 1/2 tsp
Salt - to taste
Green chilli - 2, minced
Ginger - 1 tbsp, julienned
Curry leaves - a few
Juice of half a lemon

In a heavy bottomed pan, heat the oil and add the mustard seeds, urad dal and curry leaves. When the mustard seeds pop, reduce the heat and add the chilli and ginger. Saute for a minute and add the mashed potato, salt and turmeric powder. Mix well and heat for at least 5 minutes. Switch off heat. Add lemon juice and stir to mix well.
Enjoy!!!

Variation : Leave out the lemon juice and add 2 tbsp of freshly grated coconut to the podimas.

Tuesday, March 24, 2015

Spaghetti with no meat veggie balls in tomato sauce


I have often heard people talk about how good spaghetti and meat balls are together. Being a vegetarian, i decided to avoid the meat and cook vegetable balls to create Spaghetti and veggie balls. The vegetable balls are cooked in an aebelskiver/appam/paniyaram pan, thereby minimizing the use of oil.


What you need :
Cook spaghetti according to package directions. Drain and run cold water over it and set aside.

To make the vggie balls :

Potato - 1, peeled and diced
Carrot - 1, diced
Cauliflower florets - 1/2 cup
Onion - 1, chopped fine
Bread slices - 4
Oil - a few tsp

Steam cook the potatoes, carrot and cauliflower and then mash well. Heat a tsp of oil and saute onions in it. Add the mashed veggies and saute until moisture is absorbed. Add soaked and squeezed bread slices and mix well. Shape into balls. Heat an appam/paniyaram pan with a few drops of oil in each depression. On a low flame, cook the balls, turning over once in a while until all sides are browned evenly.

For tomato sauce:
Tomato - large, juicy, ripe - 4
Onion - a small one, chopped fine
Salt - to taste

Heat a teaspoon of oil in a pan. Saute onions till pink. Add the pureed tomatoes and salt. Cook on low flame until at least half of the moisture is evaporated and the sauce starts to thicken.

To serve :
Arrange some pasta on a serving plate. Place two veggie balls on it and top generously with sauce. Serve immediately.


Wednesday, March 18, 2015

Cheppankizhangu/Arbi/Colcasia roast

Sometimes, a simple stir fry can make all the difference to a meal. It can elevate the otherwise regular meal and make people reach out for second and even third helpings. This arbi/colocasia roast does exactly that.


What you need :
Arbi - 6 or 7, medium sized, cooked, peeled and diced
Red chilli powder - 1.5 tsp (adjust to taste)
Rice flour - 2 tsp
Salt - to taste
Oil - 3 tbsp
Mustard seeds - 1 tsp
Urad dal - 1/2 tsp

Take the cooked, peeled and diced colcasia in a large mixing bowl. Sprinkle flour, red chilli powder and salt over it and mix well. Keep aside for 10 minutes.
Heat a tablespoon of oil in a heavy bottomed pan. Add the mustard seeds and urad dal. When the seeds pop, add the colocasia, stir well and then let it get roasted on a low flame. Do not stir too much. Let each side brown for at least ten minutes, adding the remaining oil, a tablespoon at a time, every time you turn the arbi around. To be well roasted with a nice brown and crunchy crust, the arbi takes about 45 minutes on a  low flame. Serve with rice and sambar. I paired this with my ulli (pearl onion) sambar for a wonderfully satisfying meal.