Pages

Monday, December 19, 2011

Pittha

Pittha is similar to the South Indian kozhakattai/modak and to the Tibetan momos. It has an outer cover made of rice flour/maida/wheat flour and an inner stuffing made of ground dal and spices. This is cooked in boiling water to make a soft on the outside and bursting with flavour inside snack.

What you need:
For the outer cover - Atta kneaded as you would for rotis (Maida/ rice flour is more commonly used. However, I chose to use atta)

For the filling:
Chana dal - 1 cup, soaked for 3 hours in plenty of water
Onion - 1 large
Green chillies - 2 or 3
Garlic - 4 cloves
Ginger - a small piece
Turmeric powder - 1/2 tsp
Garam masala - 1 tsp
Amchur powder - 1 tsp
Salt - to taste

Drain water from the chana dal. Add green chillies, garlic, ginger, onion and turmeric powder to it. Grind to a coarse paste without adding any water. To this, add the garam masala, amchur and salt. Mix well.

Pinch out a small ball of atta. Roll it into a circle. Place some filling inside the cirlce.

Fold one side over the other to make a semi circle. Press down with a fork on the edges to make a beautiful pattern.

Bring 7-8 cups of water to a rolling boil in a large kadai. I used my pressure cooker. Drop 3 or four of the stuffed pitthas into the boiling water. It will sink down when dropped in, but will soon rise to the top. Once it rises to the top, reduce the flame to medium and let it cook for 5-7 minutes. You will know it is done when a knife inserted in the middle comes out clean.

Let it cool. Cut each pittha into two pieces. Heat some oil in a pan. Add some mustard seeds to it When the seeds pop, pour this season over the prepared pitthas. Mix well. Serve with green chutney and tamarind chutney.


Check out the Blogging Marathon page for the other Blogging Marathoners doing BM#11

Sunday, December 18, 2011

Litti

Litti chokha is synonymous with Bihar. In fact, it is the only Bihari food that I had heard of before this blogging marathon. My Bihari friends painted a beautiful picture with words for me when they described the making of littis. They said that the whole family would gather around a charcoal fire. The women would deftly shape the atta into thick, deep cups and fill them with sattu flour. They would then roll them into balls, press them between the palms and pass it on to the men folk who would then cook them over charcoal. Cooked littis were then served with a generous helping of ghee and chokha.
The recipe is the same as that of sattu paratha. The difference lies in the making.

What you need:
For the filling:
Sattu flour - 1 cup
Onion - 2 medium, chopped fine
Ginger - 1 inch piece, julienned
Garlic - 8-10 cloves, chopped coarsely
Corriander - a handful, chopped fine
Ajwain - 1 tbsp
Lemon juice - to taste
Green chillies - 5-6, minced
Salt - to taste
Mustard oil - 3-4 tbsp

Mix all the ingredients well.

For the outer covering:
Atta - kneaded with water and salt, as you would for rotis

Pinch out a large, tennis ball sized amount of atta. Using your fingers, shape it into a cup. Place some of the filling inside.

Bring the sides together and close the cup. Flatten between your palms.

These are usually cooked, like I said in the beginning, over a charcoal fire. Since I didn't have that at my disposal, my litti has been cooked in the oven. The taste, though it does not match that of a fire cooked one, is still good enough. Cook in a preheated oven for 20-25 minutes until well browned on both sides.

Serve hot topped with ghee and a generous helping of chokha.
Check out the Blogging Marathon page for the other Blogging Marathoners doing BM#11

Saturday, December 17, 2011

Sattu paratha

Sattu is a flour that is commonly used in Bihar. From what I have gathered from the internet and from talking to my friends, it is made from black chana which is slow roasted over a low flame and then powdered. It is used as a filling for parathas, it is mixed with water to make a nutritious, breakfast drink or it is mixed with rice and eaten with a dollop of butter/ghee.
In Bangalore, sattu powder is available at MK Retail outlets and also at the Total Mall in Sarjapur. This is not to be confused with the sathu mavu that is used in South India to make kanji/a health drink.
Sattu paratha is made by stuffing this powder into atta dough, then rolling out and cooking. It is very, very filling and tasty too.

What you need:
For the filling:
Sattu flour - 750 gms
Onions - 5, finely chopped
Ginger - a large piece, julienned
Garlic - 8-10 cloves, chopped
Green chillies - 8-10, minced
Ajwain/omam/carom seeds - 2 tbsp
Salt
Juice of 1 lemon (can be substituted with amchur powder)
Mustard oil - 1/4 cup

Dry roast sattu flour over a low flame until thoroughly warmed(5-8 minutes).
Add in all the other ingredients and mix well.

This tastes great in itself and I am told that this can be mixed with rice and eaten as is.
Knead atta as you would for regular rotis.
Pinch out a large ball of atta. Roll out into a thick, small roti. Place some filling in the middle and seal all the sides to make a ball.
Roll this out into a thick paratha.

Cook on a hot tawa with plenty of ghee on both sides.

Serve with chokha or pickle and raita.

Check out the Blogging Marathon page for the other Blogging Marathoners doing BM#11

Friday, December 16, 2011

Baingan tamtar aur aloo ka chokha

One of the things that I love about blogging is that it helps me learn a lot about food from other parts of the country and the world. A few days back, I would not have know what sattu is or what a thekua is. But today, thanks to the blogging marathon theme of Bihari cuisine, I am actually able to write a post on a very typical, rustic dish that is commonly made in Bihari households.
Let me give you a little background on how I came upon this recipe. Having decided that I was going to cook Bihari food for a week, I spoke to my colleagues about it. One of them is from Bihar and the other 2 had friends in Bihar and so, were familiar with the food. So, we got talking and kept talking for well over an hour and to say that our stomach were all growling by the end of the hour, would be an understatement. So, we decided to cook a typical Bihari meal together for lunch that day. The next few hours were nothing short of absolute, pure fun and a really, really unforgettable lunch.
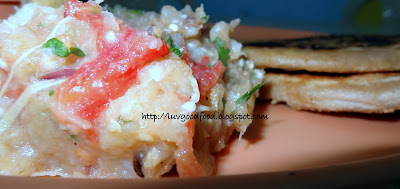
Today, I will be sharing with you the recipe of one of the dishes we cooked called a chokha. A chokha is basically a side dish which is made up of fire roasted and mashed vegetables. Commonly used vegetables are potato, tomato and brinjal. These can be used separately or in combination. In this recipe, all three have been used together.
What you need:
Eggplant/brinjal - The large, Japanese variety - 3
Tomato - 6 large
Potato - 8 or 9, medium sized
Onion - 3, finely chopped
Ginger - a large piece, julienned
Garlic - 15-20 cloves, chopped fine + a few more
Green chillies - 8-10 (adjust to taste)
Hing - a few pieces
Corriander - a handful, chopped fine
Mustard oil - 1/4 cup
Salt
Juice of 1 lemon
Make 5-6 small slits in the eggplant. Insert a clove of garlic and a small piece of hing into each slit.
Roast the eggplant over a low flame turning from side to side frequently to make sure that all the sides get evenly cooked.
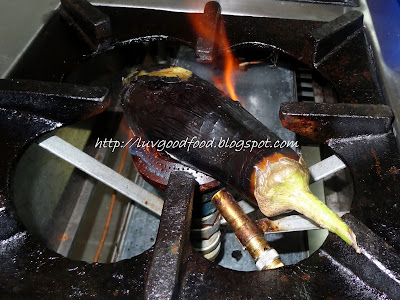
This will take a good 15 minutes. You will know the eggplant is done when the skin starts peeling off as your are turning it and when a knife can be easily inserted into the eggplant. Remove and set aside to cool.
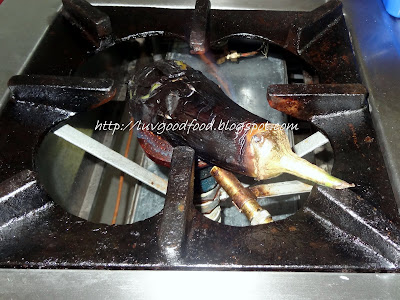
Once cool, mash the brinjals and keep aside in a bowl.
Similarly, roast the tomato over the flame. Use tongs to turn the tomato from side to side to ensure even cooking and to avoid burning.
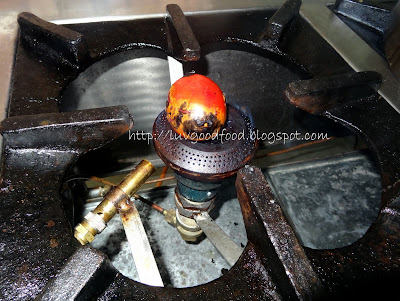
Once the skin turns black and starts peeling off as you turn the tomato, remove from the flame and allow to cool.

Remove the charred skin, mash well and keep aside.
Potatoes, my friends tell me, are also usually cooked over coal, but we chose to wrap them individually in foil and then bake them in the oven for about 20-25 minutes.
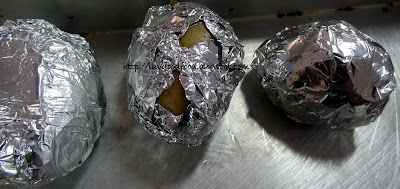
They were beautifully cooked by then and were mashed and set aside.
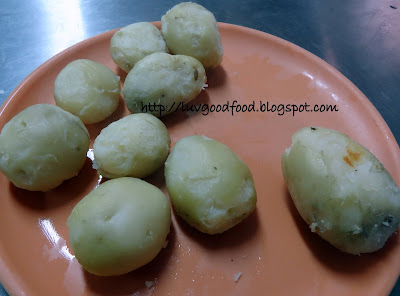
Now mix together all the three mashed veggies in a large mixing bowl. Add in chopped onions, ginger, garlic, green chillies, corriander, salt, lemon juice and mustard oil. Mix well.
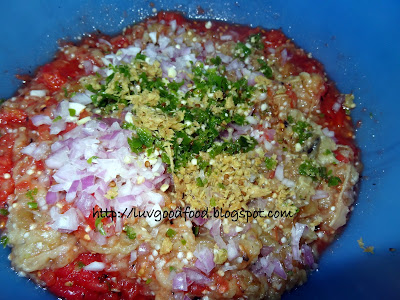
Serve with parathas. (Recipe for sattu paratha coming up next)
Note : This recipe makes a huge quantity of chokha - enough to feed 12-15 people. The recipe can be easily modified to make smaller quantities.

Check out the Blogging Marathon page for the other Blogging Marathoners doing BM#11

Saturday, December 10, 2011

Restaurant Review - The Fat Chef

What???
Italian, American, Mexican, sandwiches, burgers
Where???
5/2 Jagriti, Ramagondahalli, Varthur Road, Whitefield, India 560066
Contact :(080) 41119768/(080) 40992981/(080) 40992982/9844932817

Having read excellent reviews of the restaurant, we decided to go to The Fat Chef for dinner tonight. The restaurant is situated right next to the entrance to Renaissance Jagriti, on Varthur Road, Whitefield.
Now, let's talk about what I liked about the restaurant.
The ambiance is fantastic. Spacious, with plenty of out door and indoor seating, this is one restaurant that anybody will like at first sight. Having called ahead to make a reservation, we were able to avoid waiting outside, and were shown to our table almost immediately on arrival. The restaurant has no printed menu......the day's menu is put up on boards at the entrance and we have to go, look at it and then place our order.
We ordered Baby corn fingers for starters, pasta alfredo for the main course, and french fries for the LG. We also ordered Pepsi and fresh watermelon juice. The water melon juice was served promptly, but the Pepsi never came, despite reminding a waiter once. After that, we just told the waiter to cancel the order for the Pepsi. The baby corn fingers and the dip served with it had a strange sour taste. We didn't like it much.
The spaghetti in alfredo sauce was excellent. It had just the right blend of flavours, and was perfectly seasoned. The garlic bread was really good too.
What I didn't like:
The waiter put a bowl of steaming pasta and a basket of bread in front of us, but forgot to give us plates. We waited for a while, but there was still no sign of plates. We finally had to call another waiter and ask him to get us plates.
Our water glasses were never refilled. Despite several waiters walking around from table to table, not one of them came around with a jug of water to refill our empty glasses.
We had to wait for an inordinately long time to get our bill. Again, we had to ask for the bill twice......I don't know why the first person we asked never got around to getting us the bill.
Will I go there again???
Even though the starter was nothing to write home about, I really enjoyed the rest of our meal. The service, however, was terrible. I might go back another time for the food, but if the service isn't better next time, I am sure I will never go back again.

Thursday, November 17, 2011

A tribute to Jayasree

It is with a heavy heart that I write this post. To say that I was shocked when I read about Jayasree's passing away, would be an understatement. Even though we have never met face to face, she and I have talked over the phone and kept in touch with each other through mail. Every time my blog was silent,she would send me a mail or a facebook message asking me if I was alright. She is one blogger I always wanted to meet, not only because we share the same name, but also because we cook and blog about the same kind of cuisine. For this post, and in fond remembrance of Jayasree, I have recreated her ragi idiyappam - a dish that I often make following her recipe.

Friday, September 09, 2011

Cilantro soup

I am usually not very adventurous when it comes to soups. I stick to plain old tomato soup and in the rare event of choosing something different, I don't venture further than Sweet Corn soup. This soup that I am blogging about today did not tempt me at first glance. Who wants to drink something that's green in colour, was my first thought as I wrinkled my nose up and prepared to be disgusted. The first spoonful, however, totally blew me away. I loved the smell and the flavour of fresh corriander. The recipe is from the Chef who made this soup for a formal get-together at my workplace.

Corriander - 1 large bunch or 2 small bunches - washed well and chopped
Butter - 1 tbsp
Garlic - 8-10 cloves
Onion - 1, chopped fine
Carrot - 2, grated
Celery & Leeks - a little, chopped
Bay leaf - 1
Black pepper corns - a few
Maida/All purpose flour - 1 tbsp
Veg stock or water - I used about 10 glasses. Adjust according to how thick/thin you want your soup to be.
Salt - as needed

Add butter, sauté garlic in it. Add onions, carrots, celery, leeks, and sauté. Add one bay leaf and black peppercorns. Saute. Add flour. Once the raw smell is gone, add vegetable stock or water. Add fresh chopped cilantro. Cook on a slow flame until water gets the flavor of cilantro. Strain and puree. Adjust seasonings. While reheating, add a little butter and cream.
Serve hot.

Wednesday, August 10, 2011

Healthy Lunchbox Ideas - Paneer - Roundup

Though late, the round up is finally here. Thank you everybody for sending in these wonderful entries. I have many of them bookmarked to try over the weekends. The round up is done in random order.
First, we have Harini who has sent in her yummy, perfectly triangular paneer onion stuffed kulchas.

Priya's paneer bhurji is quick to make, and sure to make even the most finicky kid ask for more.

Rajitha shares her paneer vegetable fried rice, which is sure to bring a happy smile to the face.

Saraswathi shares with us five wonderful entries. Do check out her
potato paneer peas pulav,

simple paneer peas pulao,
paneer bhurji,

matar paneer
&
palak paneer

No one can say NO to this delectable whole wheat homemade paneer pizza that Harini has brought in.

Kaveri's methi paneer pulao has earned her a lot of praise from her family and her kids always empty their lunch boxes when this is packed in it.

Shoba's Kesaria Paratha is so beautifully presented that people are likely to lap it up as soon as they see it.

Shoba also sends in a carrot paneer toasted sandwich.

Khushi sends in something that made even her mother-in-law happy & excited. Her grilled corn paneer pizza has passed the mother-in-law test and so, is sure to be a crowd pleaser.

Kalyani, the brain behind this event has me drooling over her tempting entries. Take a look at her Paneer Mutter,
Paneer Manchurian

Raisin & Paneer Pulao

Paneer pulao seems to be a popular dish in this round-up. Sravani sends us her version of this dish.

Kalyani shows us What's Cooking on her blog with this paneer potato curry

There's something about the combination of green peas and paneer that sets the stomach rumbling. Swetha tells us how she cooks this combo for her family.

Nirmala sends us her crispy paneer dosa - an interesting twist to the traditional dosa.

Aparna has chosen ingredients that both her son & husband love, to cook this delicious Paneer Mushroom Masala.

Vardhini shows us three different ways in which paneer can be used as a side dish.
Check out her paneer koftas in gravy,

healthy mutter paneer

& spaghetti with paneer balls.

The final entry is from Denny who gives us a fool proof, easy, versatile and simple recipe to make Grilled Paneer & Veg Tikkas.

I would like to thank all of you for sending so many entries my way and to thank Kalyani for giving me the opportunity to host this event.


Thursday, July 21, 2011

Aval/Rice flake cutlets

Very often I find myself buying something, only to find that I already have a pack or two of it at home. Then, after stuffing as much of it as I can into the freezer, I try to find ways of using up what remains. It is while trying to use up some(well, a lot, actually) of rice flakes/poha, that I chanced upon a recipe for cutlets made out of rice flakes. The recipe is modified from Tarla Dalal's "Iron Rich Recipes".
What you need:
Rice flakes - 1 cup
Green gram dal - a handful
Green chilli - as many or as few as you like
Salt
Garam masala
Potato - 1, boiled, peeled and mashed
Turmeric powder - 1/2 tsp
Chopped corriander

Soak the rice flakes and dal separately in water for atleast 30 minutes. I used matta rice flakes which handle soaking pretty well. However, if you are using a thinner variety, I would suggest just washing it thoroughly until wet through and not soggy.
Drain off all the water and grind the rice flakes (after squeezing out as much moisture as you can out of them) and dal coarsely in a blender. Mix in the other ingredients. Shape it into small balls and flatten them between your hands. Now heat a shallow frying pan (I used my microwave), arrange the cutlets on it, drizzle some oil over it and fry until crisp and brown on both sides.
Serve with some ketchup or as is.
I do not have any pics of the cutlets as we finished them before I could click any.....will update the next time I make these.
Check out the blogging marathon page to see what my fellow marathoners are cooking.

Wednesday, July 20, 2011

Quick and easy masala chana/chick peas

One of the recurring themes in my blog is quick and easy recipes. I had soaked black chana in the morning with the intention of making my usual kadala curry to go with aapam. However, as I was looking through my cookbooks, wondering what else I could make for the blogging marathon, I chanced upon this recipe in Mallika Badrinath's 100 Vegetarian Gravies. As the name suggests, it is easy to make - and is cooked entirely in one pot, which makes cleaning that much easier.

What you need:
Black chana/chick peas - 1 cup, soaked in plenty of water for 10 hours. (The original recipe uses white chick peas, but since I had already soaked these, I used them)
Cardamom - 3
Cloves - 5
Cinnamon - a small piece
Oil/ghee - 2 tbsp
Salt - to taste
Grind together:
Onion - 1
Tomato -2
Garlic - 5 or 6 cloves
Ginger - a 2 inch piece
Red chilli powder - 1 tsp
Corriander - 1 small bunch
Cumin seeds - 1 tsp
Black peppercorns - 1/4 tsp

Heat oil in the pressure cooker. Add cardamom, cinnamon and clove. Add the ground mixture and fry on a low flame until oil separates. Add chick peas, sufficient water and salt and cook until one whistle. Then lower the heat and cook for another 10 minutes.
Serve hot.
Check out the blogging marathon page to see what my fellow marathoners are cooking.

Tuesday, July 19, 2011

Amritsari sookhi dal

To me, a dal that you eat with roti has always been a wet curry. Though I have heard of sookha dal, the concept was unimaginable to me. Until today, that is. When I chanced upon Sanjeev Kapoor's "Dal Roti", the picture of this dal tempted me enough to make me try it out at home. Now that I have made it, I can say that not only does it look good, it tastes quite hearty and good too.

What you need:
Split urad dal - 1/2 cup
Turmeric powder - 1/2 tsp
Ginger - a 3 inch piece, julienned
Oil - 3 tbsp
Asafoetida - a little
Cumin seeds - 1 tsp
Onion - 1, chopped fine
Green chilli - 2 or 3, minced
Tomato - 2, chopped
Red chilli powder - 1 tsp
Garam masala - 3/4 tsp
Corrinder leaves - to garnish,chopped
Amchur powder - 1 tsp (the original recipe calls for lemon juice)

Wash the dal well. Take it in a deep dish. Add 3 cups of water, salt, turmeric powder and half of the ginger. Let it come to a boil. Then reduce flame and simmer until just done.
While the dal is getting cooked, heat oil in a pan. Add cumin seeds, asafoetida and onions. Saute until onions turn pink. Add the remaining ginger, green chillies and tomato. Saute for a minute or two. Add red chilli powder and heat till oil separates.
Now drain all the excess water from the cooked dal and add it into the pan. Mix well. Add garam masala, salt if required, amchoor powder and corriander leaves. Mix well and heat for 2-3 minutes.
Enjoy!!!
Check out the blogging marathon page to see what my fellow marathoners are cooking.
This goes to Priya's bookmarked recipes event.

Monday, July 18, 2011

More urundai kuzhambu(Steamed lentil balls in yogurt gravy)

A gravy made of buttermilk is standard fare in any South Indian home. It goes by the name of more kuzhambu in Tamil Nadu, moru kari in Kerala and majjige huli in Karnataka. The usual version that I make with ripe plantain or colocasia or ash gourd is posted here.
This version is made using steamed balls of tuar dal. I first tasted this at a restaurant in Chennai and quite liked the aroma and the taste of it. Today, with the help of Mallika Badrinath's recipe from her book Classic Lunch Recipes, I have been able to recreate a remembered taste.

What you need:
For the urundai/koftas
Tuar dal - 1/2 cup(scant)
Whole white urad - 1 tbsp
Green chillies - 2 or 3(adjust to taste)
Onion - 1 small, chopped very fine
Chopped corriander leaves - a few
Cumin seeds - 1/2 tsp
Salt - to taste (use a little less than you normally would as the gravy too has salt)

For the kuzhambu/gravy
Sour thick curd - 2 cups (beaten lightly to break up lumps)
Turmeric powder - 1/2 tsp
Salt
Grind together:
Fresh grated coconut - 1/4 cup
Green chillies - 2 or 3
Coriander seeds - 1.5 tsp
Cumin seeds - 1/2 tsp
Tuar dal - 1 tbsp
For tempering:
Oil - 1 tsp
Mustard seeds - 1/2 tsp
Red chillie - 1, broken
Methi seeds - 1/4 tsp
Curry leaves - a few

To make koftas/urundai:
Soak the dals together for an hour. Drain all the water. Add in all the other ingredients except onion and corrinder. Grind to a coarse paste without adding any water. Mix in the chopped onions and corrainder. Shape into lemon sized balls. Grease an idli plate and stem for 8-10 minutes. Set aside the balls to cool.

To make kuzhambu:
Soak all the ingredients listed under Grind together, except coconut in just enough water to cover for at least 30 minutes. Add coconut and grind to a smooth paste.
Transfer this to a pan. Add 1/2 cup of water, salt, turmeric powder and let it boil for a few minutes. Add the whipped curd and boil some more. Just before removing from fire, add the steamed koftas and boil for a minute or two.
Heat the tempering ingredients until the mustard seeds pop. Pour this over the kuzhambu.
Enjoy with rice/idli/dosa.
This tastes even better the next day after the flavours have blended together well.
Today is Day 3 or Blogging Marathon #7, and this is my post under the theme Cooking from cookbooks. Check out the blogging marathon page to see what my fellow marathoners are cooking.

Monday, July 11, 2011

And the winner is......

I used a random number generator to pick the winner of the giveaway......and the winner is Vardhini of Zesty Palette.
Congratulations, Vardhini.

Friday, July 08, 2011

Five years of blogging and a giveaway

A few days back, my blog turned five years old. To celebrate, I am giving away a book to one lucky winner. I thought long and hard about which book I should give away......and finally decided that there could be nothing better than Cooking At Home with Pedatha - an award winning cookbook authored by Jigyasa Giri and Pratibha Jain.

With over sixty traditional Andhra recipes in it, this book is written in a simple, easy to understand manner, and accompanied by beautiful pictures. Check out the sun dried rice flake fritters(aval vadam) that I made using the recipe from this book.
To win this book, you don't have to follow me or "like" me......though I am assuming that your being here and reading this means that you do like me. All that you have to do is leave a comment telling me why you think you should win this book.
The giveaway is open for a week from today. I will pick a winner and announce the name on Monday, 11th July. Please leave your email id in the comments section so that I can get in touch with you. I will be able to ship only within India.....so the winner needs to provide an Indian address to which the book can be sent.

Tuesday, July 05, 2011

Tomato-peanut chutney

For the final day of Blogging Marathon #6, I was paired with Pavani of Cook's Hideout, to cook something from her blog. The marathon finished a while back, but it is only now that I am getting down to posting what I made from her blog. This chutney is quick and easy to make, tastes good as soon as it is made and tastes even better the next day. Thank you, Pavani for the recipe.

What you need:
Tomato - 2
Peanuts - 1/2 cup
Red chillies - 3
Tamarind extract - from a gooseberry sized ball of tamarind
Salt
For tempering:
Oil - 1 tsp
Urad dal - 3/4 tsp
Mustard seeds - 3/4 tsp
Curry leaves - a few

Take the tomatoes in a microwave safe bowl. Add 1/4 cup of water, cover and microwave for 3-4 minutes until the tomatoes turn mushy. Let it cool.
Toss the peanuts and red chillies in 1/4 tsp of oil and microwave for 2 minutes. Let it cool.
Add salt,tamarind extract and grind the tomatoes, peanuts and red chillies to a smooth.
Heat the tempering ingredients. Once the mustard seeds pop, pour it over the chutney.
Serve with idli/dosa.
Don't forget to leave your comment on this post for a chance to win a copy of Cooking at home with Pedatha, an award winning cookbook.